OAuth2 是一组规范,主要提供对 Rest API 的安全访问的方法。 OAuth 的主要目的是允许通过使用令牌来执行身份验证和授权,而不必为每个操作提供凭据。由于本文的重点是实现,并且为了不重新发明轮子,可以查看 OAuth RFC 或维基百科以获取更多理论背景。在这篇文章中,我们将深入探讨 Spring 中的 OAuth2 实现以及如何使用不同的授权类型,但在此之前值得提供一些重要概念的简要定义。
访问令牌和刷新令牌
身份验证成功后将提供访问令牌以及刷新令牌。访问令牌有一个有限的有效期(标准为 1 小时),之后需要刷新令牌才能获取新的访问令牌和新的刷新令牌。 Referesh 令牌通常会在使用后过期。
资源服务器和授权服务器
OAuth 引入了授权服务器的概念,授权服务器是发出访问和刷新令牌的实体,并在每个操作中进行咨询以查看令牌是否有效。资源服务器只是由不同客户端应用程序(前端应用程序、移动设备、其他后端服务…)访问的实际 Rest API。资源服务器和授权服务器可以是不同的实体,也可以是同一实体。
授权类型
OAuth 中最常用的授权有:客户端凭据、密码、授权码和隐式授权。每项资助都有特定的流程和用例,但由于本文的重点不是理论,因此我们将重点关注其实施。有关授权及其用途的更多详细信息,请参阅 OAuth RFC。
实现
在实现方面,我们将使用 Spring Boot 来利用其自动配置和引导功能,并更多地关注我们的核心主题。
- 资源服务器:
我们有一个资源服务器,其中包含我们希望保护的以下端点:
@RestController("/")public class ResourceController {
    @GetMapping("/hello")    public String hello(){        return "hello";    }
    @GetMapping("/foo")    public String foo(){        return "foo";    }
    @GetMapping("/bar")    public String bar(){        return "bar";    }
    @GetMapping("/test")    public String test(){        return "test";    }}
为此,我们需要配置一个用 @EnableResourceServer 注释的 ResourceServerConfigurerAdapter bean:
@Configuration@EnableResourceServerpublic class ResourceSecurityConfiguration extends ResourceServerConfigurerAdapter {
    @Override    public void configure(ResourceServerSecurityConfigurer resources)            throws Exception {        resources.resourceId("resource");    }
    @Override    public void configure(HttpSecurity http) throws Exception {        http.authorizeRequests()          .antMatchers("/foo", "/bar", "/hello", "/test").authenticated().          and().csrf().disable();    }
    @Bean    public RemoteTokenServices LocalTokenService() {        final RemoteTokenServices tokenService = new RemoteTokenServices();        tokenService.setCheckTokenEndpointUrl("http://localhost:8081/oauth/check_token");        tokenService.setClientId("my-client");        tokenService.setClientSecret("mysecret");        return tokenService;    }}
我们已经告诉 spring 检查端点的身份验证(可以使用 "/*" 或 .anyRequest() 来表示所有端点)。此外,我们还配置了一个 RemoteTokenServices bean 来告诉 Spring 提供令牌检查端点(授权服务器),并配置了客户端 id 和密钥。这样我们的资源服务器就配置好了。最后,我们设置了资源 id,如果多个资源服务器使用该资源(这很常见),则该资源 id 可以在授权服务器中用作标识。
- 授权服务器:
为了实现授权服务器,我们将使用内存客户端配置。 Spring Security 还提供了将 oauth 客户端配置存储在更适合生产应用程序的数据库中的可能性。
@Configuration@EnableAuthorizationServerpublic class AuthorizationSecurityConfig extends AuthorizationServerConfigurerAdapter {
    @Autowired    private AuthenticationManager authenticationManager;
    @Override    public void configure(AuthorizationServerEndpointsConfigurer endpoints)            throws Exception {        endpoints.authenticationManager(authenticationManager);    }
    @Override    public void configure(ClientDetailsServiceConfigurer clients) throws Exception {        clients.inMemory().withClient("my-trusted-client")                .authorizedGrantTypes("password","refresh_token",                  "implicit", "client_credentials", "authorization_code")                .authorities("ROLE_CLIENT", "ROLE_TRUSTED_CLIENT")                .scopes("read", "write", "trust")                .accessTokenValiditySeconds(60)                .redirectUris("http://localhost:8081/test.html")                .resourceIds("resource")                .secret("mysecret");    }
    @Override    public void configure(AuthorizationServerSecurityConfigurer oauthServer)            throws Exception {          oauthServer.tokenKeyAccess("permitAll()")                .checkTokenAccess("permitAll()");    }}
除了我们在其中配置客户端、密钥、oauth 范围(下一篇文章中将详细介绍)、权限(与令牌关联的角色)、令牌有效性、资源 id 之外,我们还配置了对 Spring Boot 在 /oauth/check_token 处提供的检查令牌端点的访问,以及对也自动映射在 /oauth/token 处的令牌发行端点的访问。
OAuth 的实际应用
我们已将授权服务器配置为在端口 8081 上运行,将资源服务器配置为在端口 8989 上运行。对于下面的所有示例,都使用 curl ,但客户端可以是任何应用程序。
我们首先尝试访问资源服务器中的一个端点:
curl localhost:8989/foo{ "error": "unauthorized", "error_description": "Full authentication is required to access this resource"}让我们获取一个令牌并重试。
- 客户凭证授予:
curl -X POST --user my-trusted-client:mysecret localhost:8081/oauth/token -d 'grant_type=client_credentials&client_id=my-trusted-client' -H "Accept: application/json"回复:
{ "access_token": "3670fea1-eab3-4981-b80a-e5c57203b20e", "token_type": "bearer", "expires_in": 51, "scope": "read write trust"}我们现在可以使用令牌来访问受保护的端点:
curl -v localhost:8989/foo -H "Authorization: Bearer 6bb86f18-e69e-4c2b-8fbf-85d7d5b800a4"
foo
客户端凭据授予不支持刷新令牌。
- 密码授予:
就获取令牌的流程而言,密码授予与客户端凭据类似,只是它使用实际的用户凭据。它还意味着需要为应用程序配置用户。 Web 安全配置如下:
@Configuration@EnableWebSecuritypublic class WebSecurity extends WebSecurityConfigurerAdapter {
  @Override  protected void configure(AuthenticationManagerBuilder auth) throws Exception {    auth.inMemoryAuthentication()      .withUser("gwidgets").password("gwidgets").authorities("CLIENT");  }
  @Override  protected void configure(HttpSecurity http) throws Exception {     http.authorizeRequests()       .anyRequest().authenticated()       .and().formLogin().defaultSuccessUrl("/test.html")       .and().csrf().disable();  }}
然后我们可以使用用户凭据来获取令牌,如下所示:
curl -X POST --user my-trusted-client:mysecret localhost:8081/oauth/token \ -d 'grant_type=password&username=gwidgets&password=gwidgets' \ -H "Accept: application/json"回复:
{ "access_token": "3670fea1-eab3-4981-b80a-e5c57203b20e", "token_type": "bearer", "expires_in": 51, "scope": "read write trust"}密码授予不支持刷新令牌。
- 隐式授予:
隐式授权最适合前端路由应用程序。隐式授权需要基本身份验证和 HTTP 会话。为了执行隐式授权,我们将向授权服务器添加一个简单的 http 页面(它可以位于不同的服务器上):
<!DOCTYPE html><html lang="en"> <head> <meta charset="UTF-8" /> <title>Title</title> </head> <body> <p>we are here</p> </body></html>要执行隐式授予,我们需要在浏览器中导航到以下地址:http://localhost:8081/oauth/authorize?response_type=token&client_id=my-trusted-client&redirect-uri=http://localhost:8081/test.html

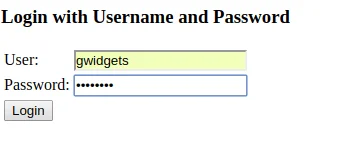
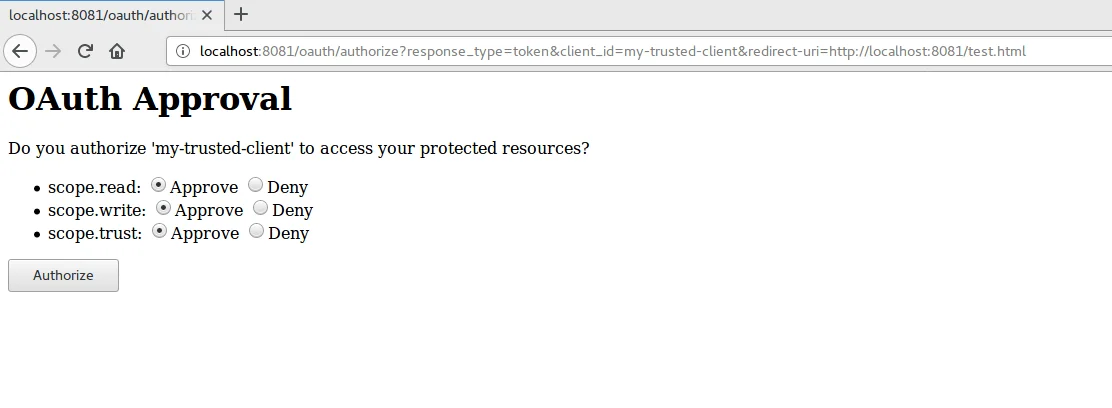
登录后,我们得到一个 OAuth 审批页面(spring 默认提供,但可以自定义):
 批准令牌的范围后,我们最终会重定向到我们的页面,在该页面中我们在 url 的哈希中找到令牌:

- 授权码授予:
对于授权码授予,我们需要首先以与隐式流程相同的方式进行授权,只不过 response_type 现在是 code 。为此,我们需要导航到:http://localhost:8081/oauth/authorize?response_type=code&client_id=my-trusted-client&redirect-uri=http://localhost:8081/test.html
然后我们被重定向到登录,登录后,我们被重定向到 OAuth 范围批准,如上一节中的隐式流程。之后,我们被重定向到以下地址:http://localhost:8081/test.html?code=bD0mVb,这是我们应用程序的欢迎页面,但带有一个特殊的查询参数: code 。我们将使用 curl 来获取令牌以进行演示,但也可以使用 JavaScript 在页面中完成此操作:
curl -X POST --user my-trusted-client:mysecret localhost:8081/oauth/token \-d 'grant_type=authorization_code&code=bD0mVb&redirect_uri=http://localhost:8081/test.html'\-H "Accept: application/json"回复:
{ "access_token": "0abe701b-0f5a-4d25-81df-f2c4db2af555", "token_type": "bearer", "refresh_token": "cf6aa9db-3757-465e-af68-b7d59d1f0b77", "expires_in": 59, "scope": "trust read write"}- 刷新令牌:
我们已经看到授权授予是唯一支持刷新令牌的授予。使用访问令牌 60 秒后,它就会过期,我们得到以下响应:
{ "error": "invalid_token", "error_description": "0abe701b-0f5a-4d25-81df-f2c4db2af555"}这意味着访问令牌已过期。要获取新令牌,我们需要使用刷新令牌:
curl -X POST --user my-trusted-client:mysecret localhost:8081/oauth/token -d 'client_id=my-trusted-client&grant_type=refresh_token&refresh_token=cf6aa9db-3757-465e-af68-b7d59d1f0b77' -H "Accept: application/json"回复:
{ "access_token": "2f9a6609-fc64-4b1e-93a3-8232827da881", "token_type": "bearer", "refresh_token": "cf6aa9db-3757-465e-af68-b7d59d1f0b77", "expires_in": 59, "scope": "trust read write"}每次令牌过期时都可以重复此过程。
总结
Spring OAuth 提供开箱即用的 OAuth 端点和流程,并且可以成为以最小的努力设置 OAuth 的绝佳解决方案。然而,对于不熟悉 Spring 的开发人员来说,这可能有点令人畏惧,因为很多事情都在幕后发生。希望这篇文章可以帮助您了解全局。在下一篇文章中,我们将讨论使用 OAuth 范围来保护端点。
完整的源代码可以在这里找到。
原文链接:http://www.zakariaamine.com/2018-01-27/using-oauth2-in-spring/