2023-12-19|Spring Security OAuth2配置JWT、Github Actions配置代码扫描
Today I Learned. 今天分享内容:Spring Security OAuth2 配置JWT、Github Actions配置代码扫描,另外,修改了 spring-security-oauth2-legacy 仓库,支持授权认证中心的多种配置方式(jdbc、内存、redis、jwt)、资源中心的多种配置方式(jwt、jdbc、redis、remote、jwk-set-uri)。
Spring Security OAuth2 配置JWT
使用 Spring Security 实现OAuth2 配置 JWT 非对称加密时, JwtAccessTokenConverter 设置生成私钥签名和公钥验证器(可省略)。
@Bean
	public JwtAccessTokenConverter jwtAccessTokenConverter() {
		JwtAccessTokenConverter converter = new JwtAccessTokenConverter();

		// 设置私钥签名
		converter.setSigner(new RsaSigner((RSAPrivateKey) new RSA("privateKey", null).getPrivateKey()));
        // 设置公钥验证器,可省略
		converter.setVerifier(new RsaVerifier((RSAPublicKey) new RSA(null, "publicKey").getPublicKey()));

		return jwtAccessTokenConverter;
	}
注意:这里使用了 Hutool 的 RSA 从字符串生成 PrivateKey 和 PublicKey
去掉对 Hutool 的依赖,则可以使用自己实现的 RSAUtil 类:
public class RSAUtil {
	public static final String ALGORITHM_KEY = "RSA";

	@SneakyThrows
	public static PrivateKey getPrivateKeyFromString(String privateKeyStr) {
		byte[] privateKeyBytes = Base64.getDecoder().decode(privateKeyStr.replaceAll("\n", ""));
		PKCS8EncodedKeySpec keySpec = new PKCS8EncodedKeySpec(privateKeyBytes);
		KeyFactory keyFactory = KeyFactory.getInstance(ALGORITHM_KEY);
		return keyFactory.generatePrivate(keySpec);
	}

	@SneakyThrows
	public static PublicKey getPublicKeyFromString(String publicKeyStr) {
		byte[] publicKeyBytes = Base64.getDecoder().decode(publicKeyStr.replaceAll("\n", ""));
		X509EncodedKeySpec keySpec = new X509EncodedKeySpec(publicKeyBytes);
		KeyFactory keyFactory = KeyFactory.getInstance(ALGORITHM_KEY);
		return keyFactory.generatePublic(keySpec);
	}
}
然后将上面代码修改为:
@Bean
	public JwtAccessTokenConverter jwtAccessTokenConverter() {
		JwtAccessTokenConverter converter = new JwtAccessTokenConverter();
		//非对称加密
		String privateKey = "";
		String publicKey = "";

		converter.setSigner(new RsaSigner((RSAPrivateKey) RSAUtil.getPrivateKeyFromString(privateKey)));
		// 可省略公钥
		converter.setVerifier(new RsaVerifier((RSAPublicKey) RSAUtil.getPublicKeyFromString(publicKey)));
		return converter;
	}
在排查错误的过程中,查看 converter.setSigningKey() 方法,new RsaSigner(String sshKey) 构造方法内调用了 RsaKeyHelper 的 parseKeyPair 方法,该方法需要传入的字符串是 “—–BEGIN RSA PRIVATE KEY” 开头
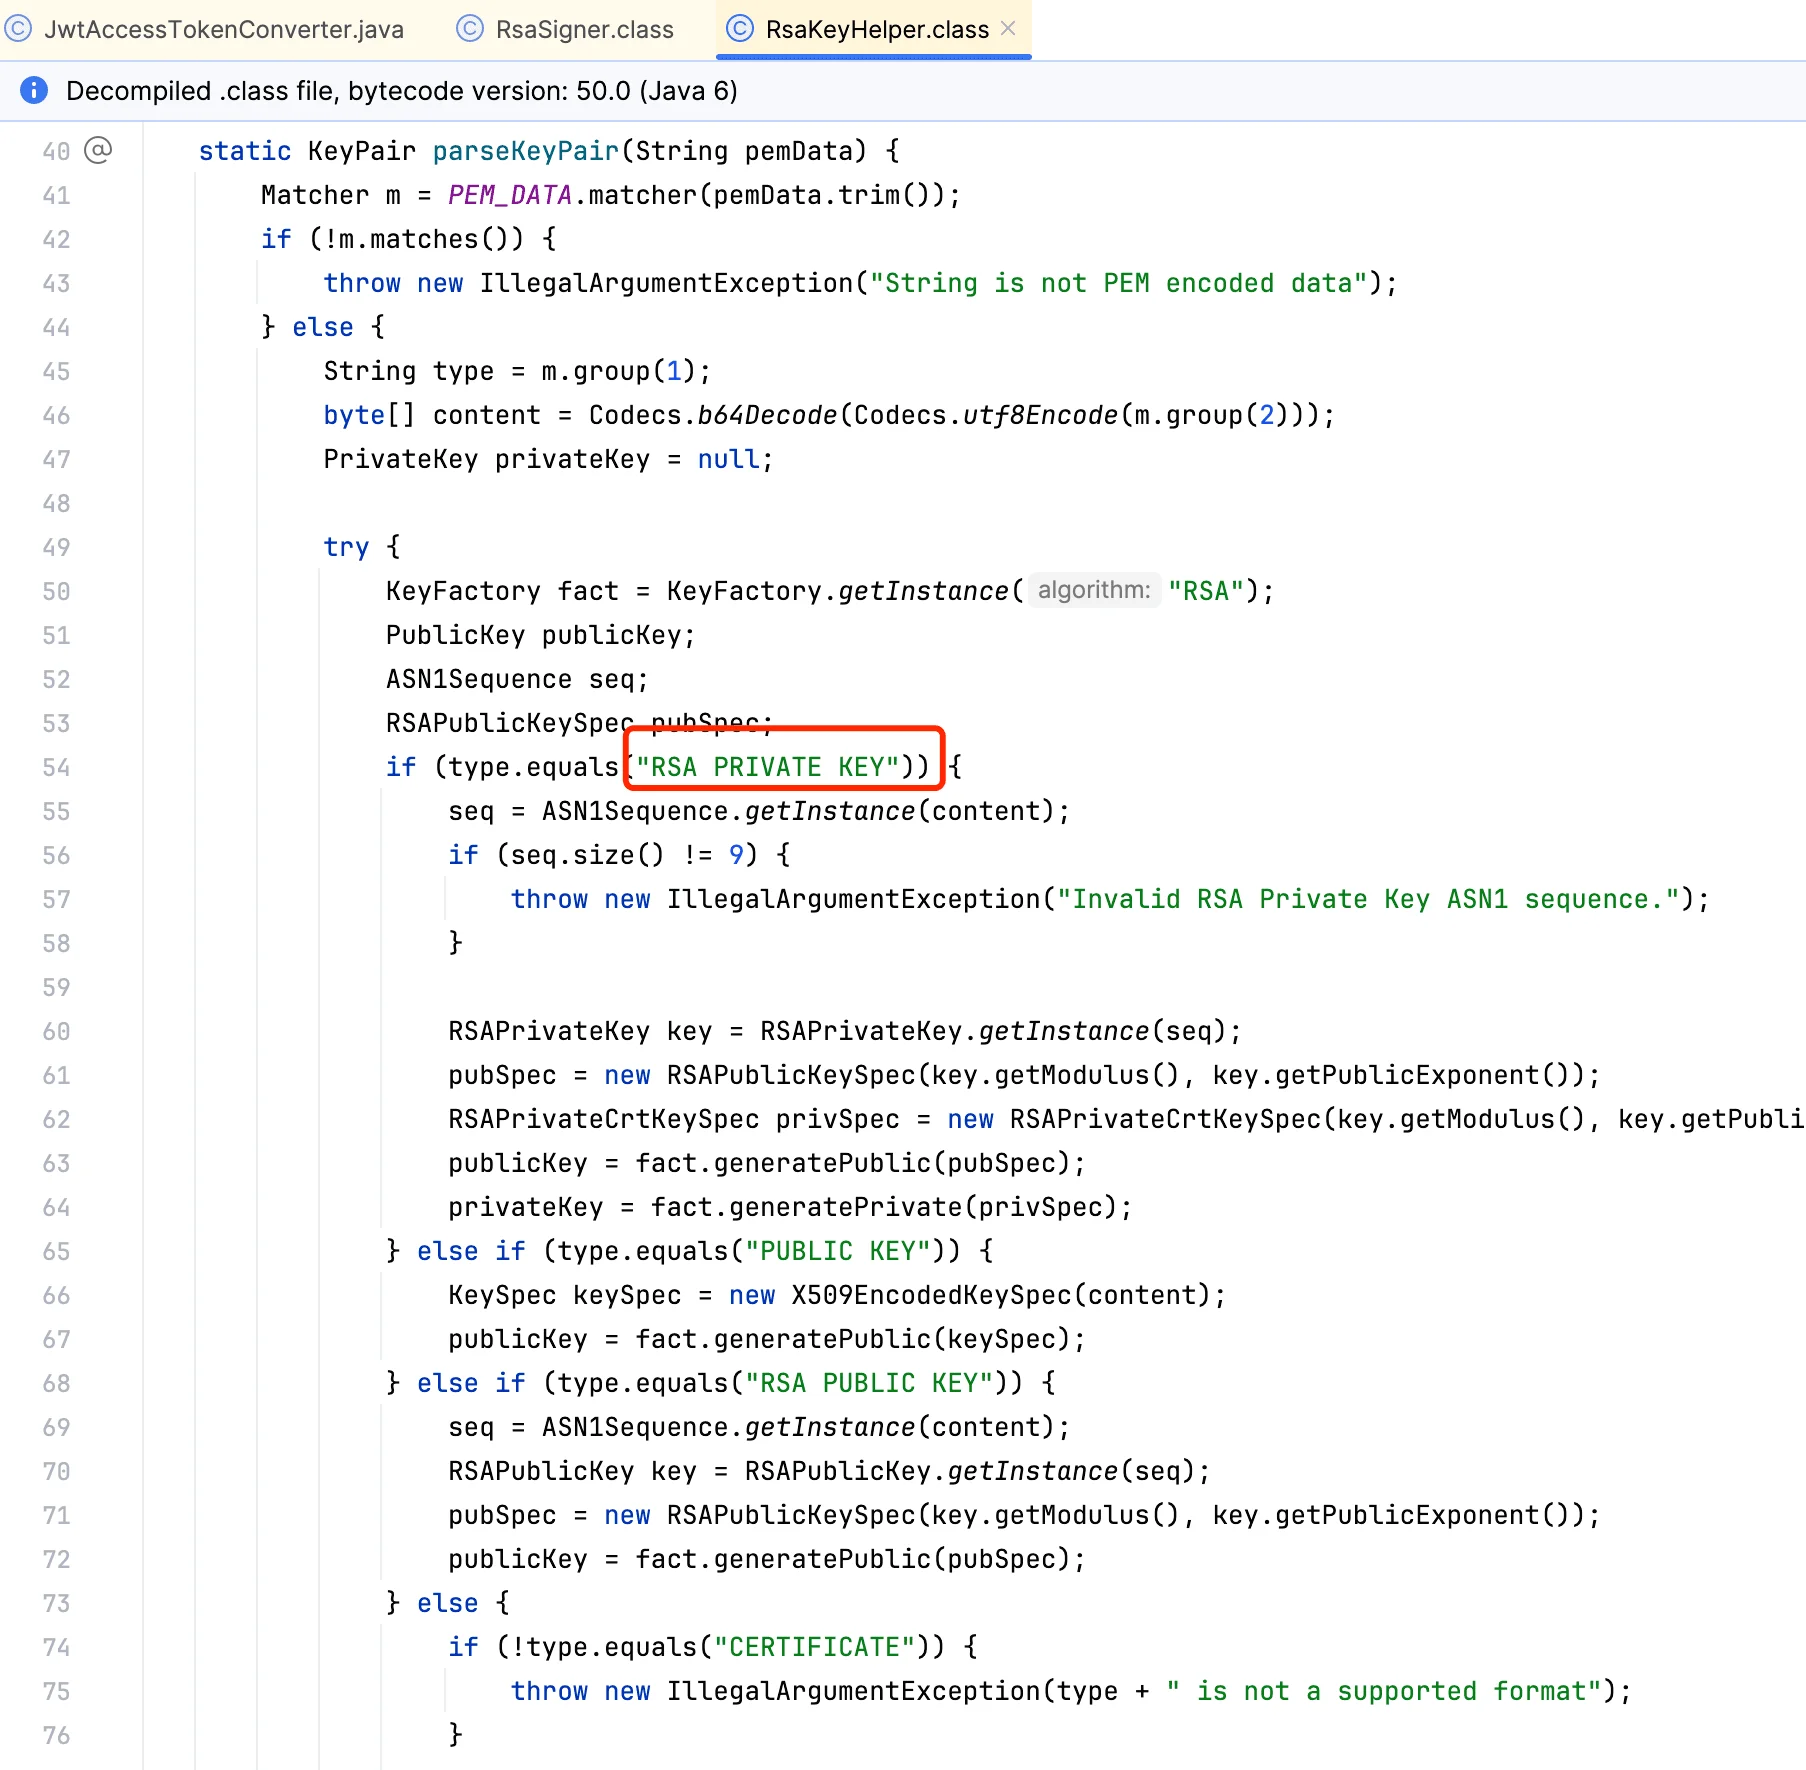
而下面代码使用 keytool 生成 JKS 文件然后导出的私钥"—–BEGIN PRIVATE KEY" 开头。
- 生成 JKS 文件
keytool -genkeypair -alias myalias -storetype PKCS12 -keyalg RSA -keypass mypass -keystore mykeystore.jks -storepass mypass -validity 3650
- 导出公钥
# 保存为 public.cer 文件:
keytool -exportcert -alias myalias -storepass mypass -keystore mykeystore.jks -file public.cer

# 保存为 public.key 文件
keytool -list -rfc --keystore mykeystore.jks -storepass mypass | openssl x509 -inform pem -pubkey > public.key
- 导出私钥,将其保存为 private.key 文件:
keytool -importkeystore -srckeystore mykeystore.jks -srcstorepass mypass -destkeystore private.p12 -deststoretype PKCS12 -deststorepass mypass -destkeypass mypass
openssl pkcs12 -in private.p12 -nodes -nocerts -out private.key
于是,找到一个 RSA 的仓库 https://github.com/xuxiaowei-com-cn/RSA,Fork 之后,对代码做了一些修改:
- 修改代码包名为我的域名 com.chensoul,以便能够部署到 sonatype 仓库。
- 去掉 Apache Common Codec 依赖
- 修改 pom.xml 中仓库信息,去掉注释
Github Actions配置代码扫描
提交代码到仓库,发现 Github Actions 中有个 Workflow codeql-analysis.yml 没有执行,于是在仓库中启用 Action,并且修改 codeql-analysis.yml 中 github/codeql-action/autobuild 版本为 v2。于是,该 workflow 可以正常执行。
参考 Github Actions — Scan Code,启用 Code scanning alerts ,发现有一个代码扫描警告:
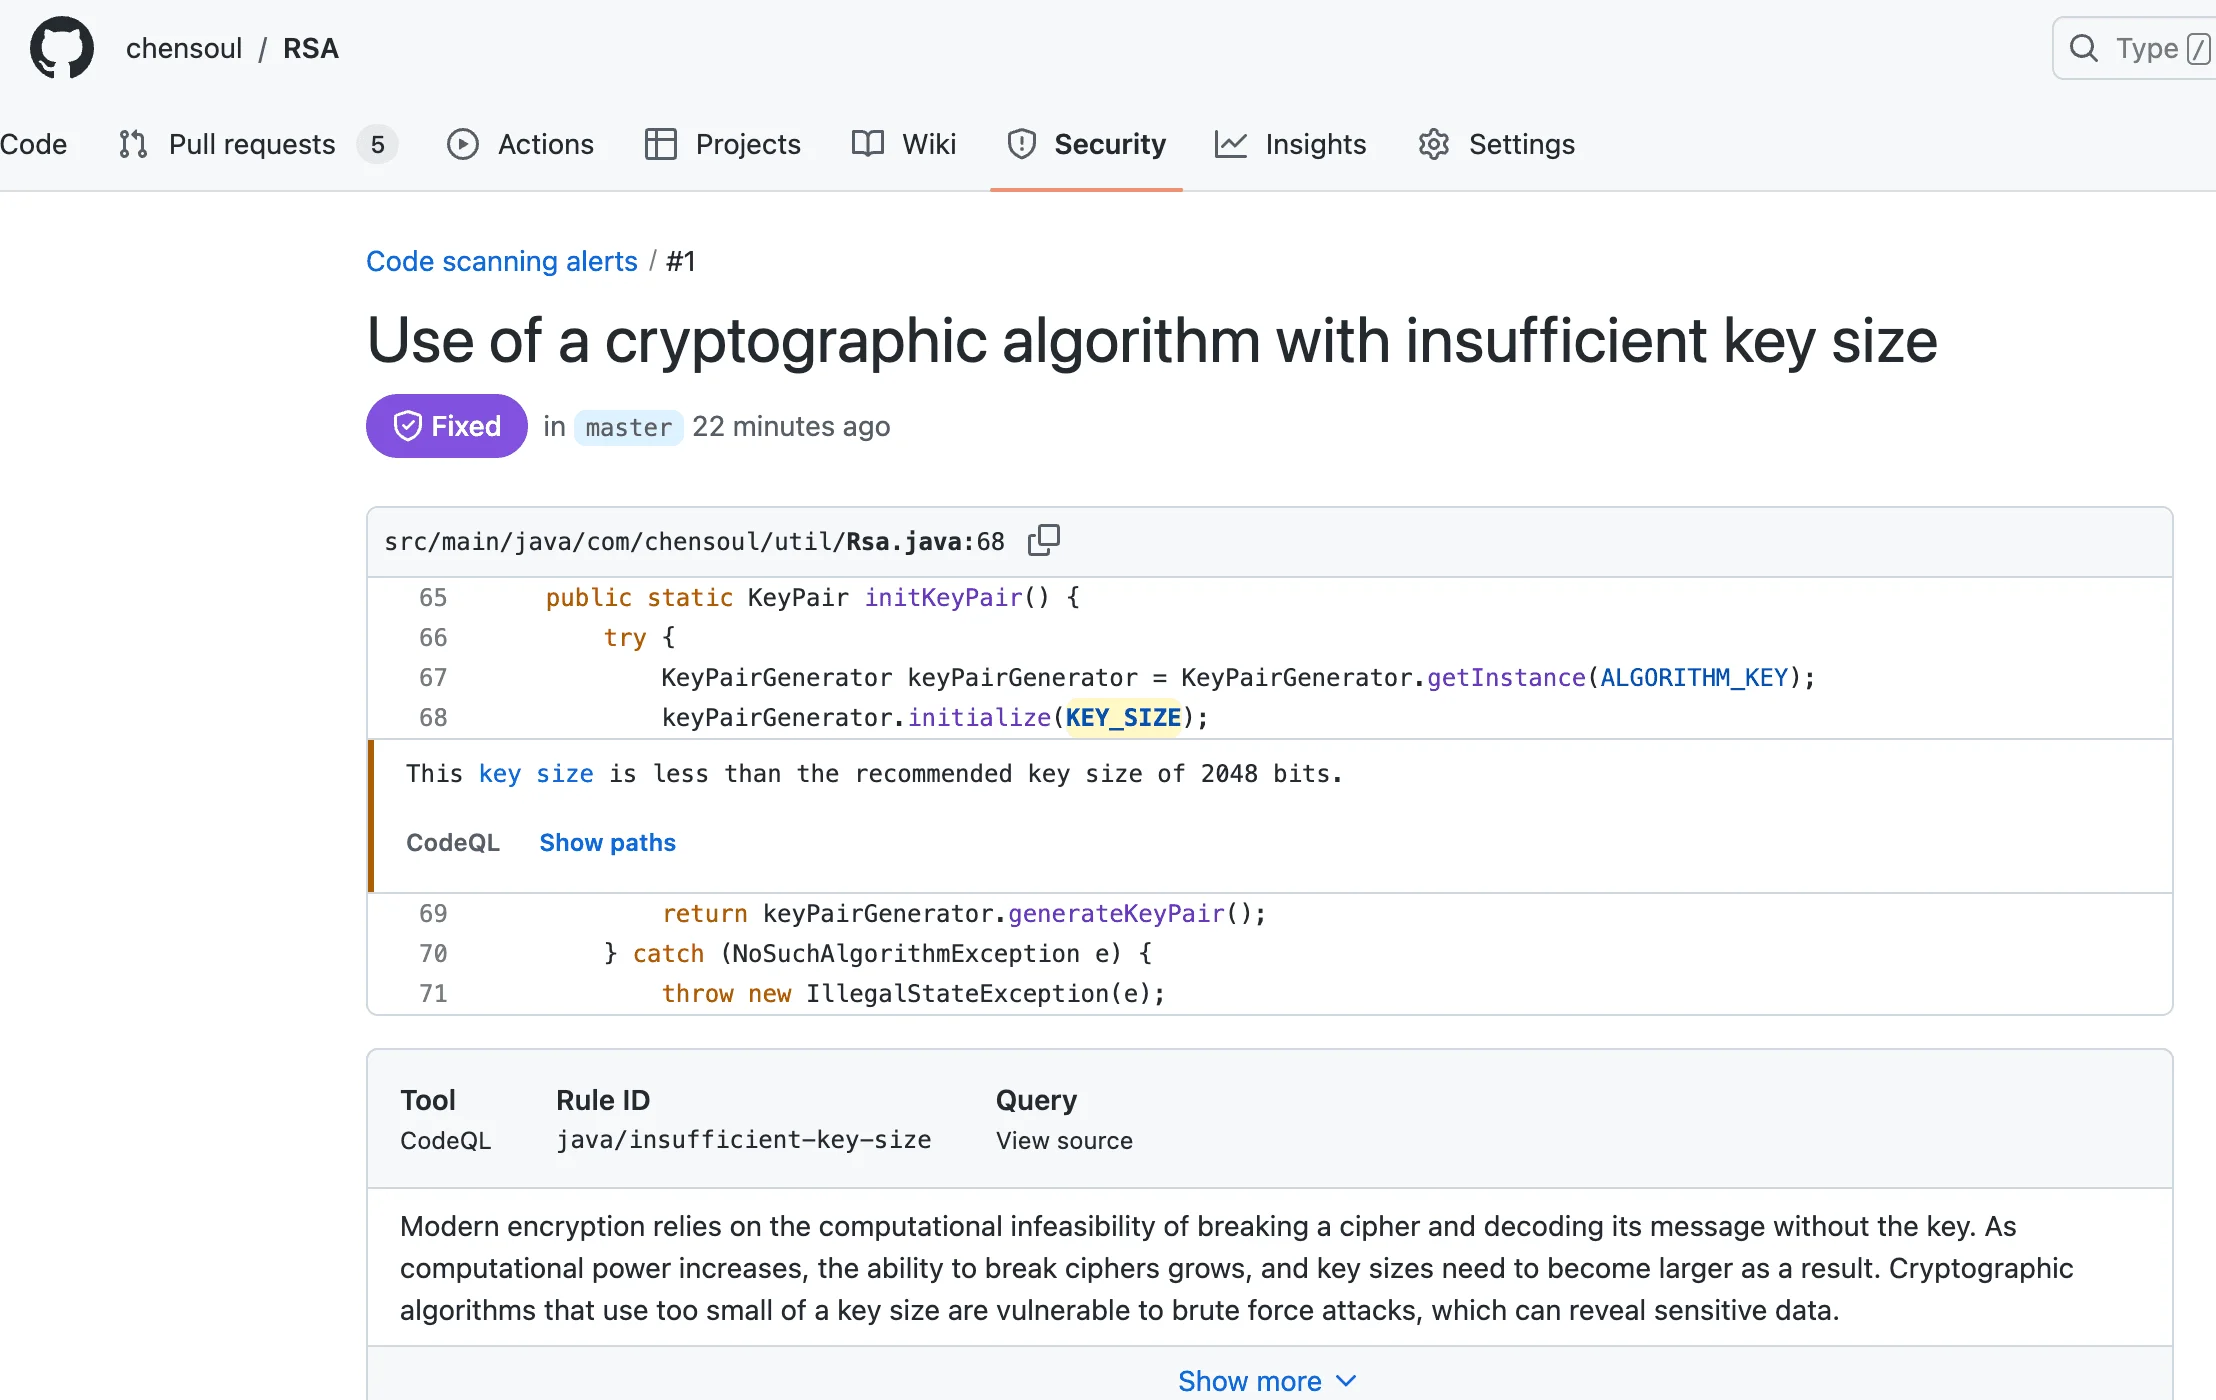
于是,参照上面说明,修改代码,再次提交代码,该警告自动关闭。
干脆把 Dependabot alerts 也启用了,并中配置页面启用相关配置:
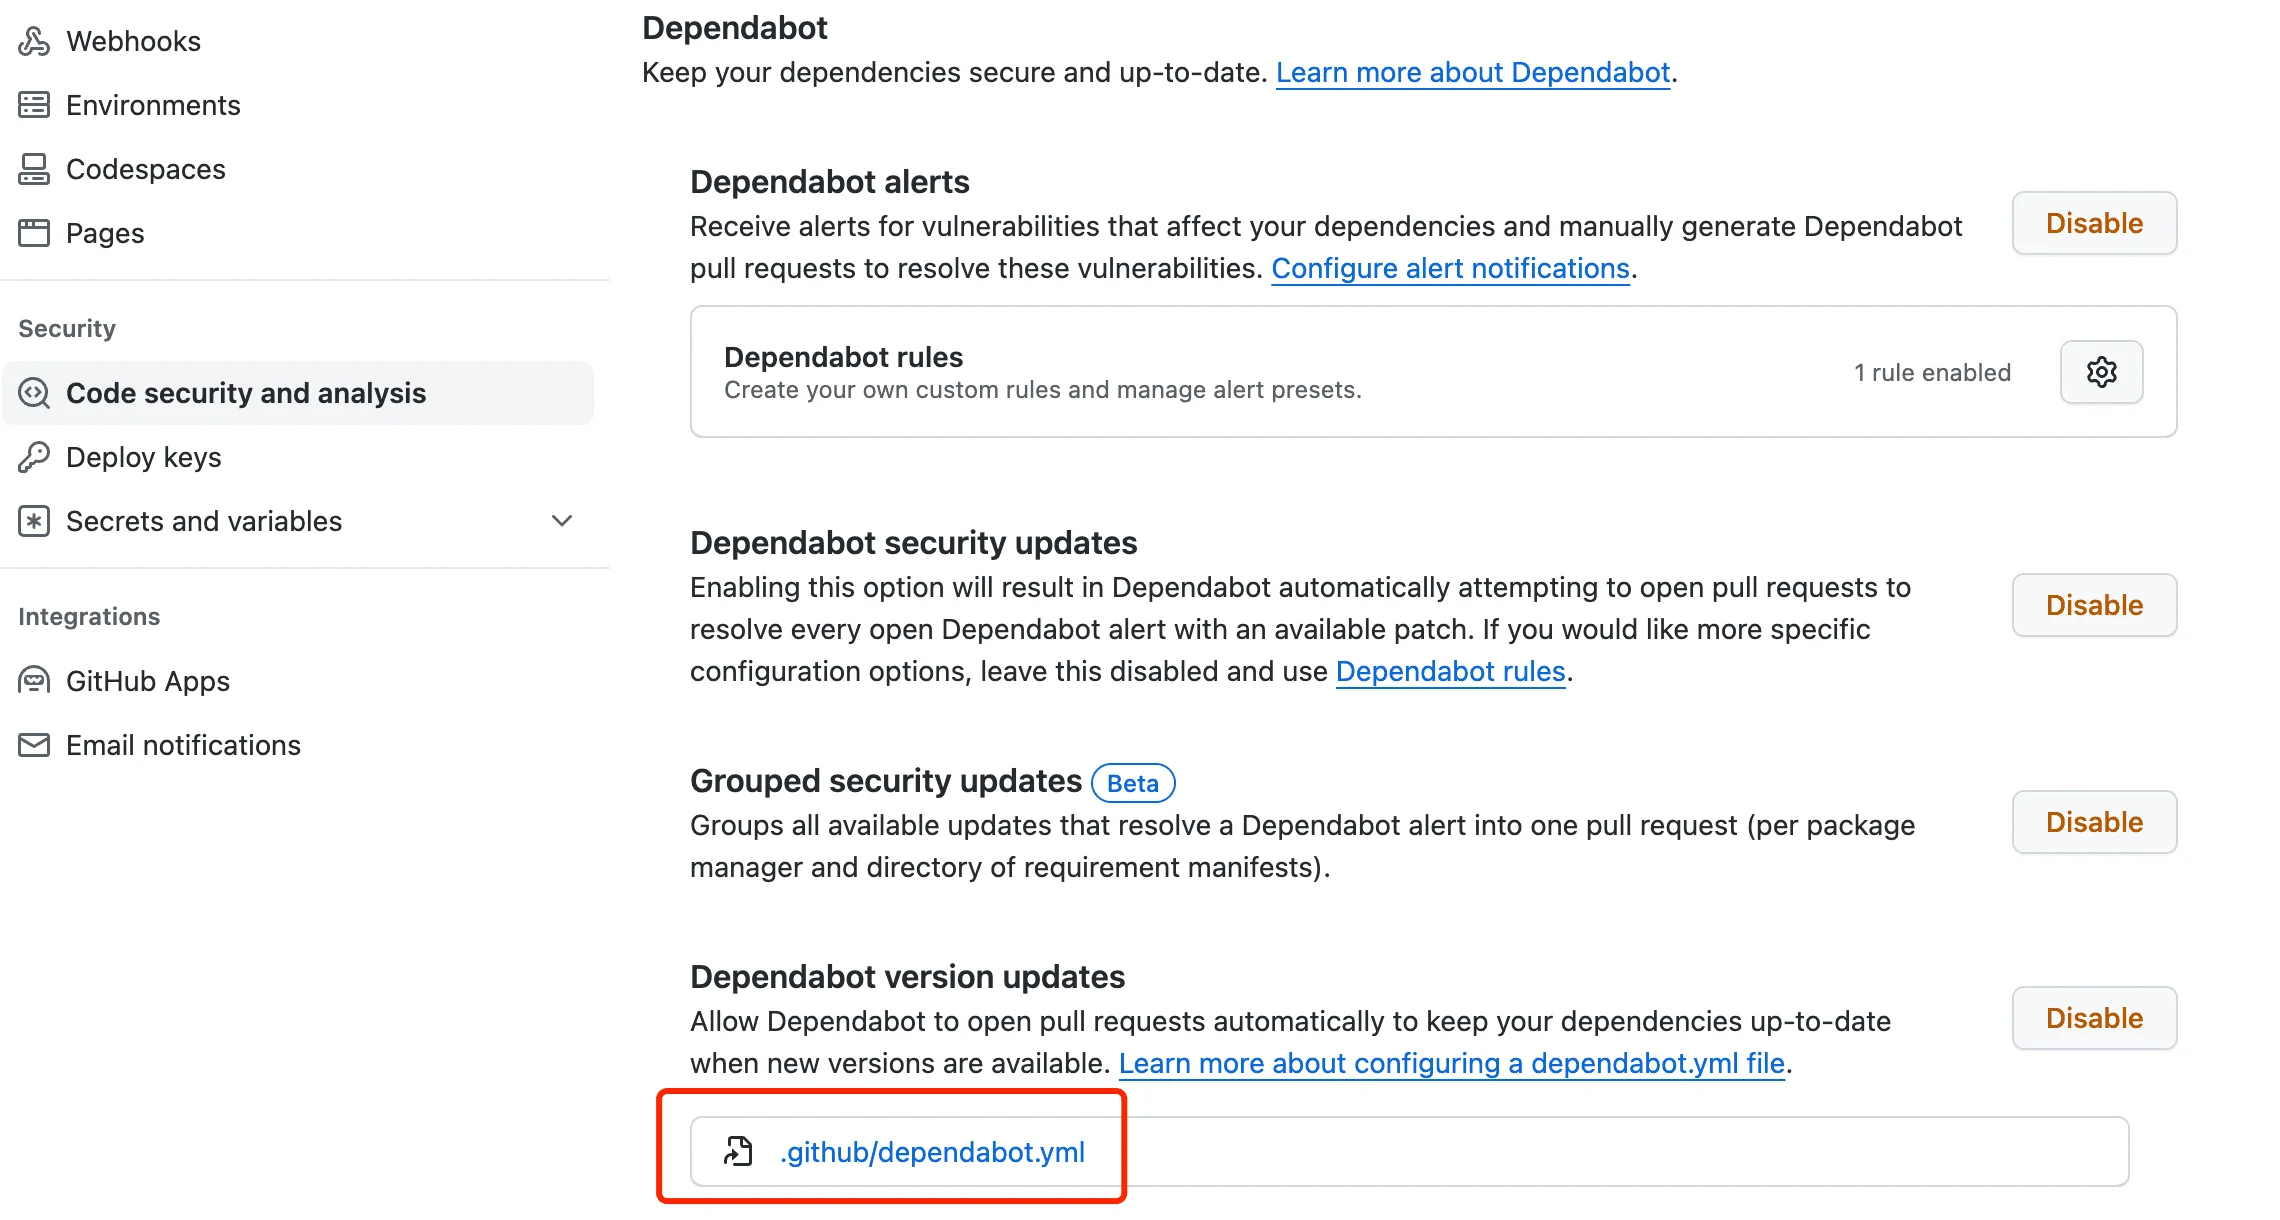
点击 .github/dependabot.yml ,修改 package-ecosystem 值为 maven。因为当前仓库是 maven 构建,所以这里设置为 maven。
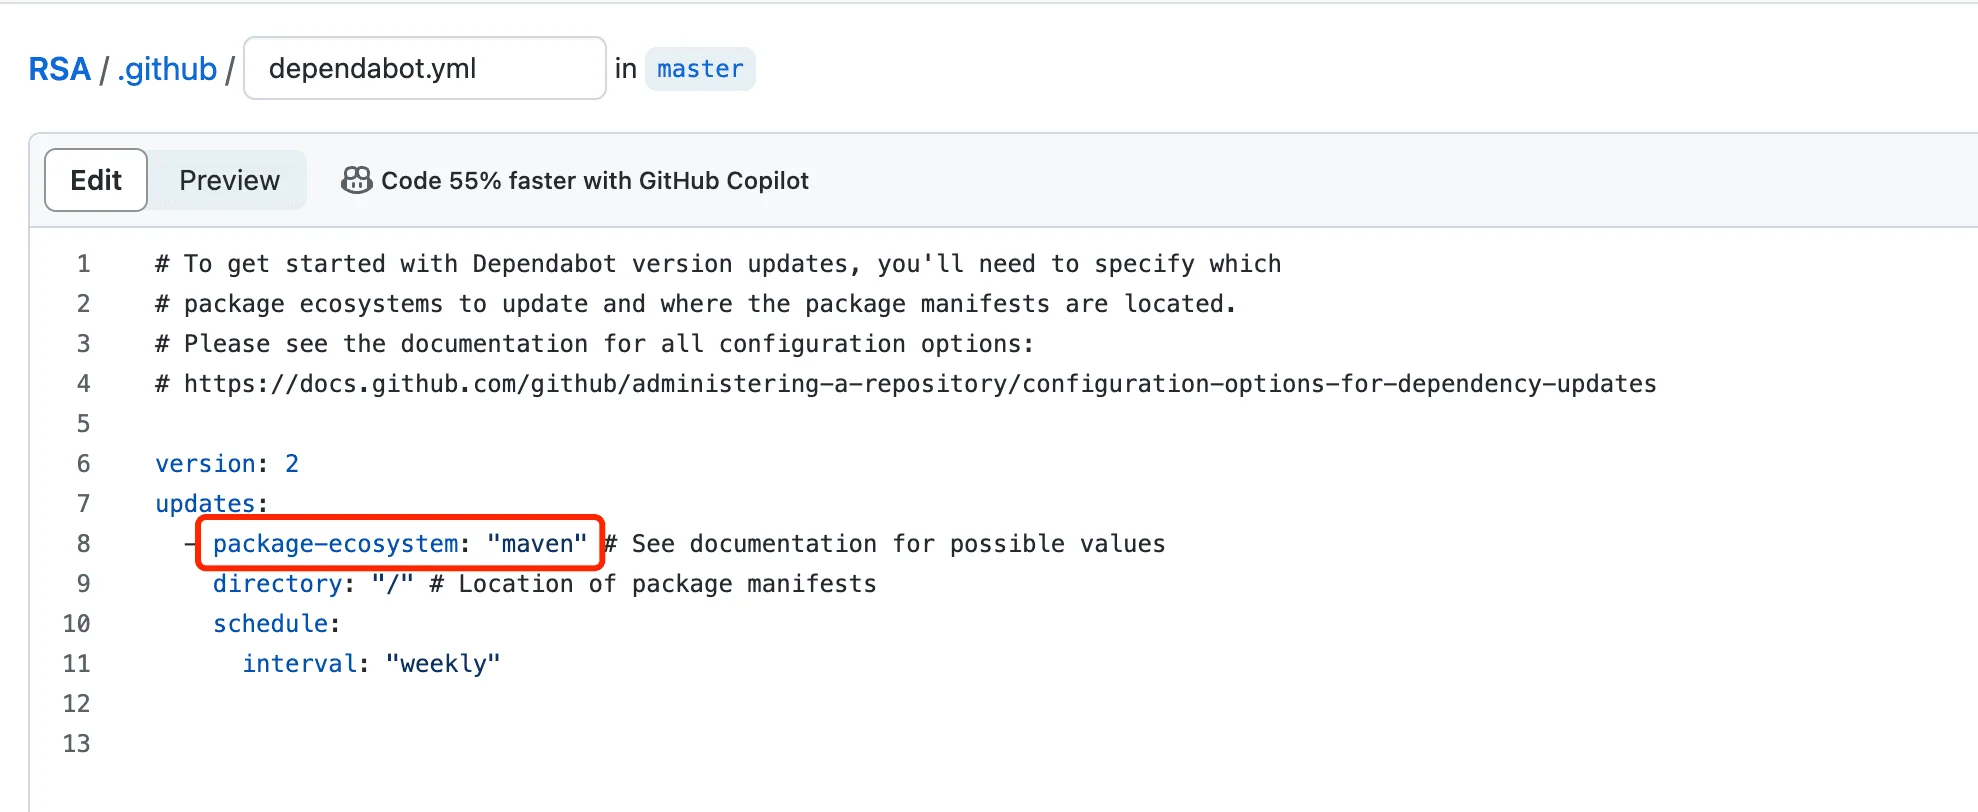
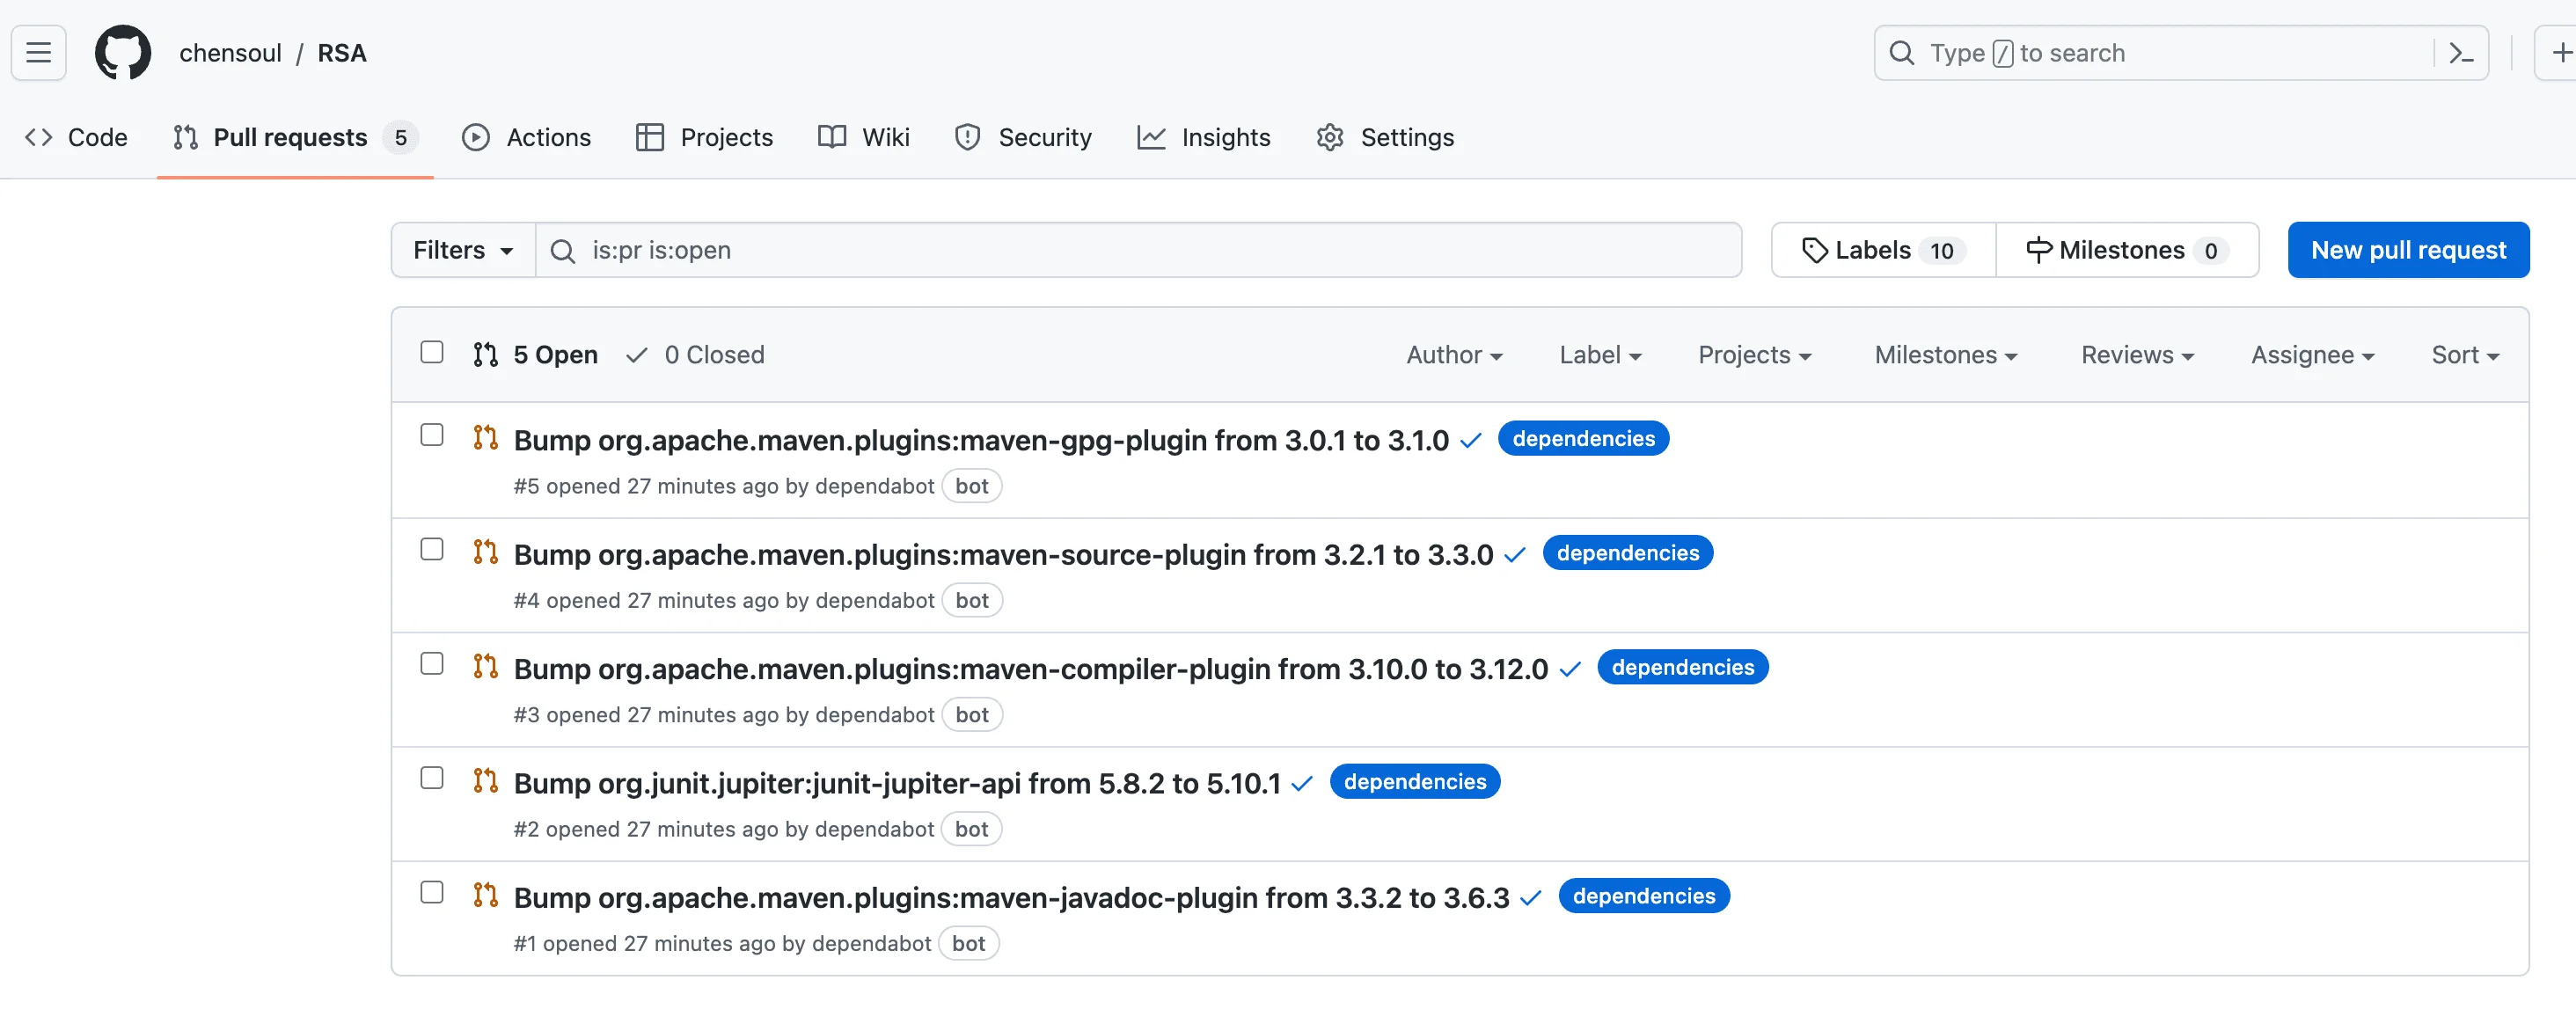
保存并提交修改。机器人扫描出五个版本需要升级,并自动创建了五个 Pull Request。
在仓库的 Security 页面,点击左侧的 Code scanning
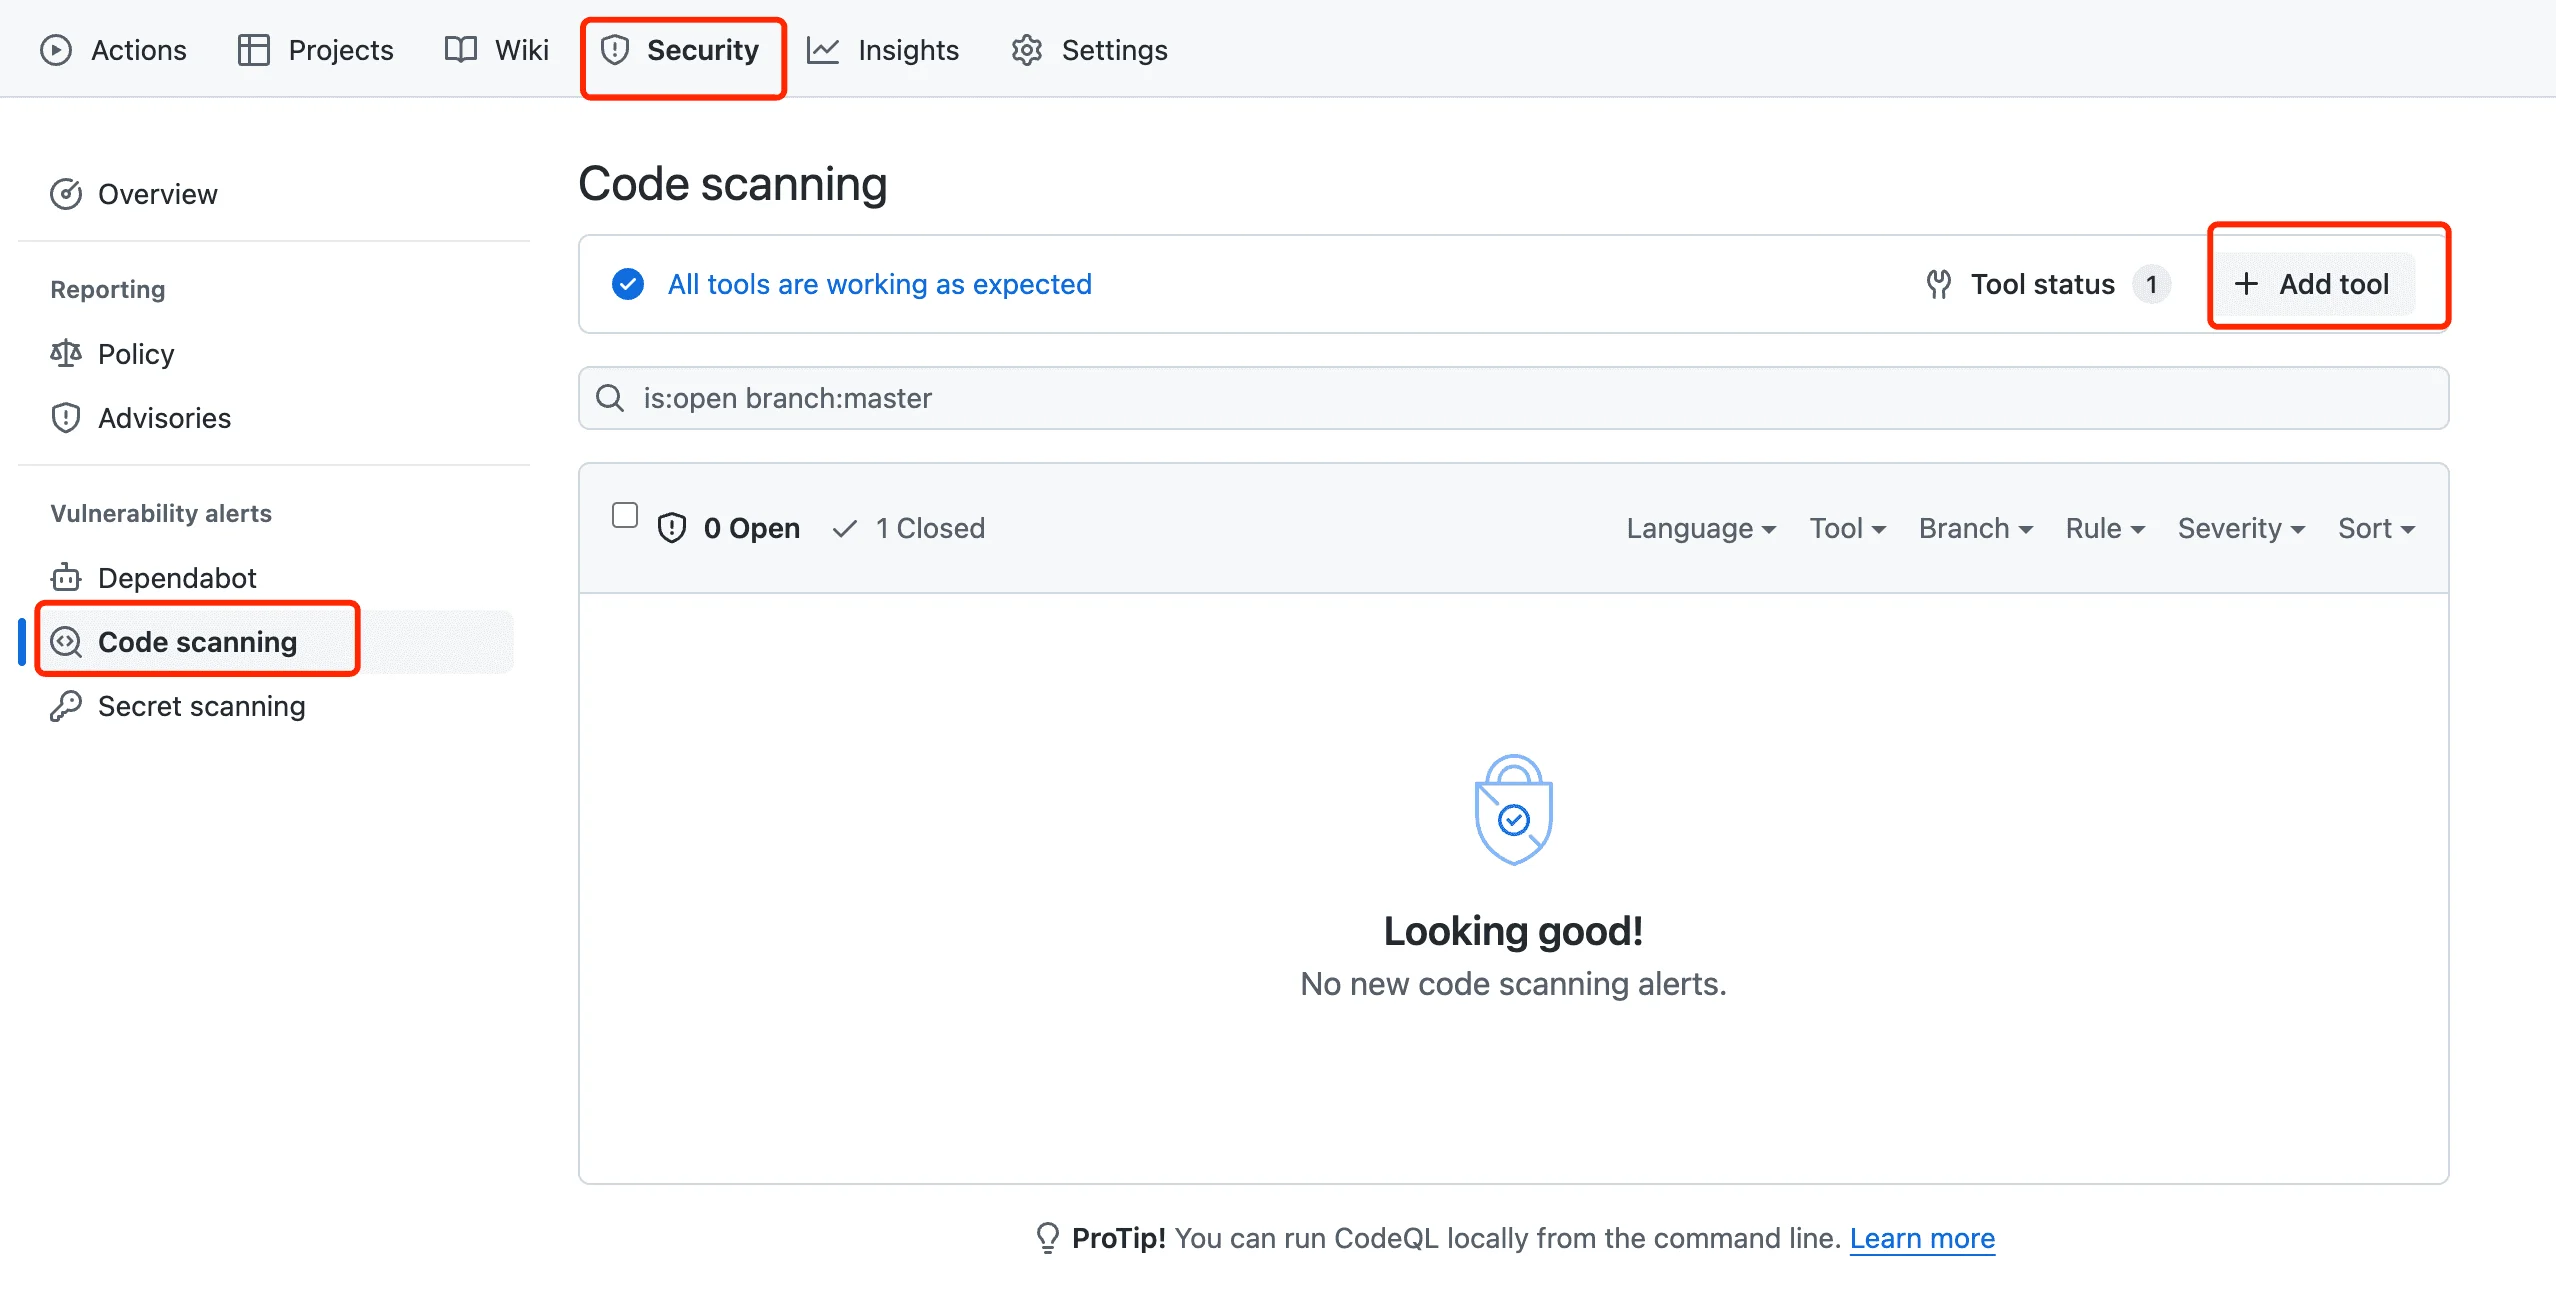
点击 Add tool,可以添加更多代码扫描工具,总共有 70 个 扫描工具可以选择,如:Semgrep、SonarQube、pmd 等等。