[译]探索 http2(第 2 部分):使用 node-http2 核心和 hapijs
原文链接:https://noobj.medium.com/exploring-http2-part-2-with-node-http2-core-and-hapijs-74e3df14249
来源:https://www.thewebmaster.com/
先决条件:了解 javascript、客户端-服务器架构。
完整的代码可以在github上找到。
第 1 部分:概述(http2 的原因、内容、时间、方式)第 2 部分:使用 node-http2 核心和 hapijs 进行探索
免责声明:本文将使用node@v9+附带的http2模块。这里列出了其他几个 http2 客户端-服务器库实现。
让我们开始创建一个具有单一路由的简单 http1.1 服务器。
mkdir hapijs-http2 && \
cd hapijs-http2 && \
npm init -y && \
npm i hapi@^16.6 -s && \
touch http1Server.js
将下面的代码复制到此处或从此处http1Server.js克隆整个存储库。
const Hapi = require('hapi');
const server = new Hapi.Server();

// define server config
server.connection({
  port: '8000'
});

// define route config
server.route([{
  method: 'GET',
  path: '/ping',
  handler: (request, reply) => {
    reply('pong');
  }
}]);

// start server
server.start(err => {
  if (err) console.error(err)
  console.log(`Started ${server.connections.length} connections`)
});
现在,让我们进行健全性检查。
启动服务器,node http1Server.js
⇒ http://127.0.0.1:8000/ping
 pong
凉爽的!如果我们得到 pong 的 ping,让我们尝试将http2集成到我们的 hapijs 服务器中。
本质上,http2 需要与 https 一起运行。为了实现这一点,我们需要ssl 证书。我们将使用OpenSSL创建一个自签名证书,或者您也可以使用此处的一个。
openssl req -x509 -newkey rsa:2048 -nodes -sha256 -subj '/CN=localhost' \
  -keyout localhost-privkey.pem -out localhost-cert.pem
我们将localhost-privkey.pem在localhost-cert.pem我们的http2Server.js.
让我们进行以下更改,
const Hapi = require('hapi');
const fs = require('fs');
const Http2 = require('http2');
const server = new Hapi.Server();

// read certificate and private key
const serverOptions = {
  key: fs.readFileSync('localhost-privkey.pem'),
  cert: fs.readFileSync('localhost-cert.pem')
};

// create http2 secure server listener
const listener = Http2.createSecureServer(serverOptions);

// create a connection object with listener and other options
server.connection({
  listener,
  port: '8000'
});

// define routes
server.route([{
  method: 'GET',
  path: '/ping',
  handler: (request, reply) => {
    reply('pong');
  }
}]);

// start server
server.start(err => {
  if (err) console.error(err)
  console.log(`Started ${server.connections.length} connections`)
});
发生了什么变化?
第 7-10 行:我们正在读取之前生成的证书和私钥。
第 13 行:创建一个安全的 Http2 服务器,其中证书和私钥作为服务器选项从
http2模块传递。第 17 行:我们可以在使用该选项创建连接时提供我们自己的服务器实现
listener。 (更多信息在这里)。仅供参考:我使用的是 node@v10.4.1,任何高于 9 的值都可以。
重新启动服务器,然后使用浏览器https://127.0.0.1:8000/ping
瞧!
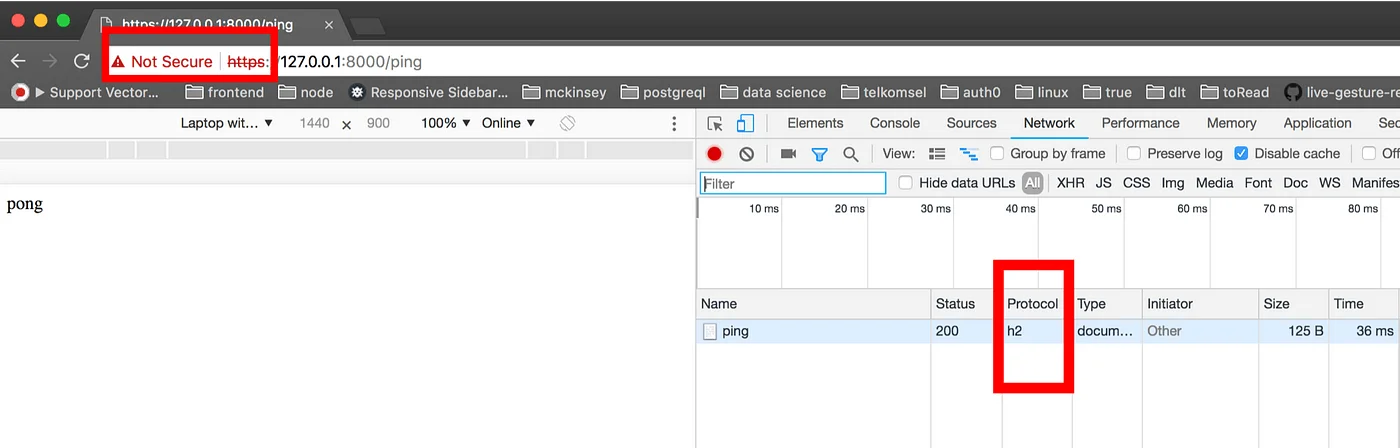
服务器用 pong 回复
需要注意的地方,
- 协议值为h2别名http2
- 尽管我们使用 https 运行,但我们在浏览器地址栏中看到不安全;因为我们对ssl 证书进行了自签名,并且浏览器无法将其识别为来自有效的证书颁发机构。
- 如果我们尝试使用curl,我们可能会得到This is because http2 may not support with default curly by your OS.您可以按照此操作升级您的curl (macOS)。
➜ curl https://127.0.0.1:8000/ping curl: Unsupported protocol - 一旦我们完成设置,我们可以尝试我们可以使用带有标志的curl来支持http2协议,我们还需要传递带有标志的证书文件,因为它是自签名的并且不能被curl识别。
curl --http2 --cacert localhost-cert.pem https://127.0.0.1:8000/ping—-http2``—-cacert
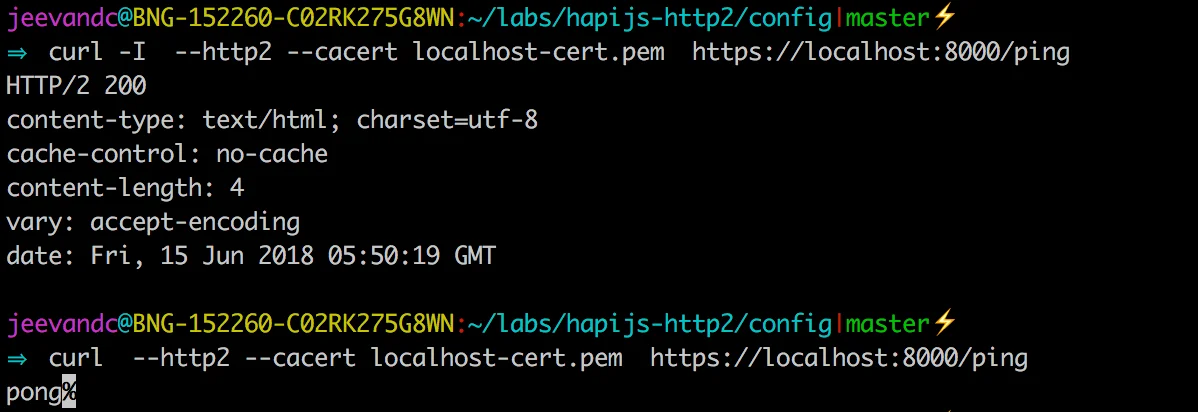
-I我们可以通过要求curl仅返回带有(head)或带有(verbose)的响应头来验证协议-v。
到目前为止,一切都很好。但我们所有的客户可能支持也可能不支持 http2。我们通过添加额外的服务器选项来处理这个问题:
allowHttp1: true
// read certificate and private-key
const serverOptions = {
  key: fs.readFileSync('localhost-privkey.pem'),
  cert: fs.readFileSync('localhost-cert.pem'),
  allowHTTP1: true
};
在 serverOptions 中添加“allowHTTP1: true” 在 serverOptions 中添加“allowHTTP1: true”
现在我们开始!当客户端不支持 http2 时,回退到提供 http1.1
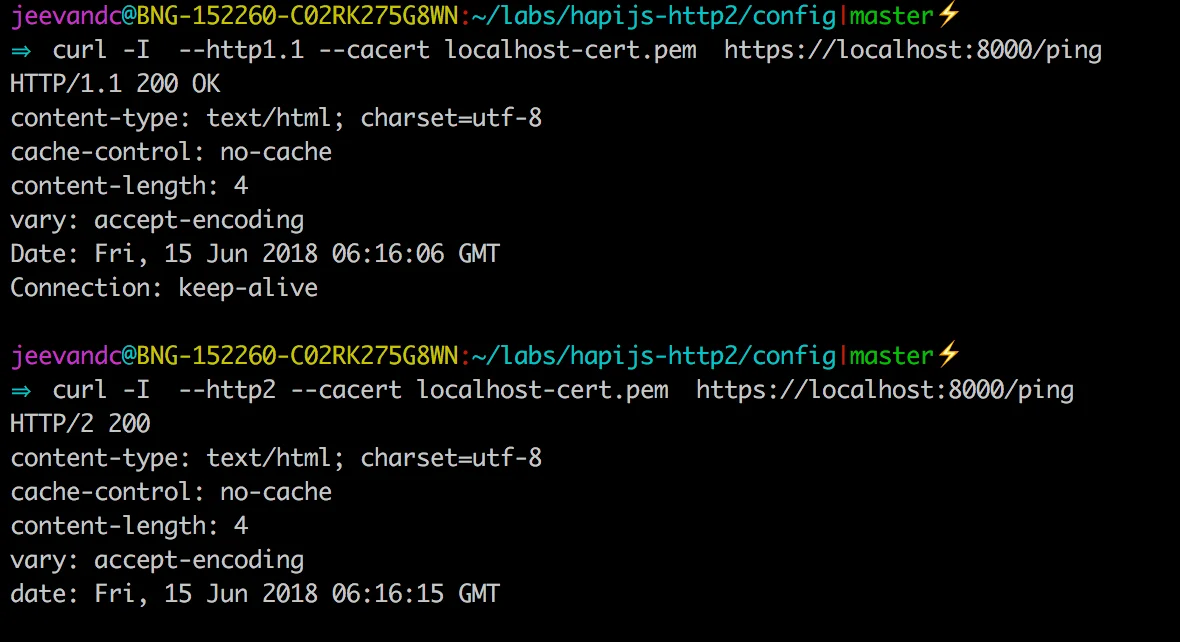
同时为 http1.1 和 http2 客户端提供服务
仅通过这些更改,我们就可以获得约 135% 的性能提升。
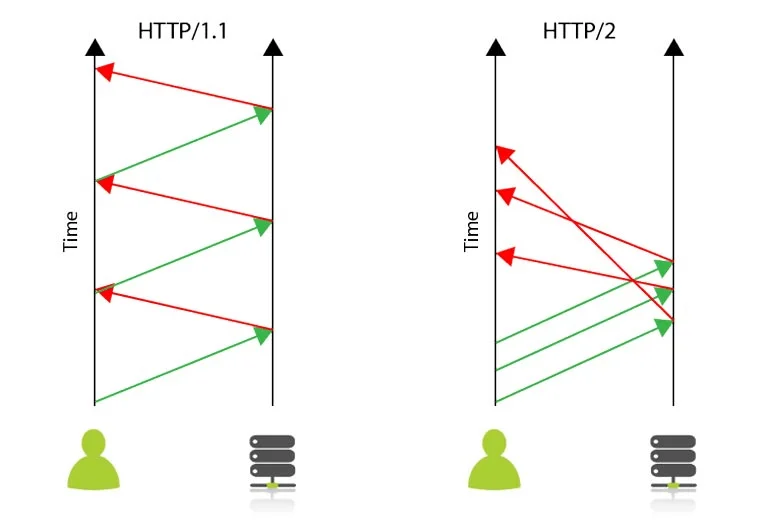
仔细观察差异,
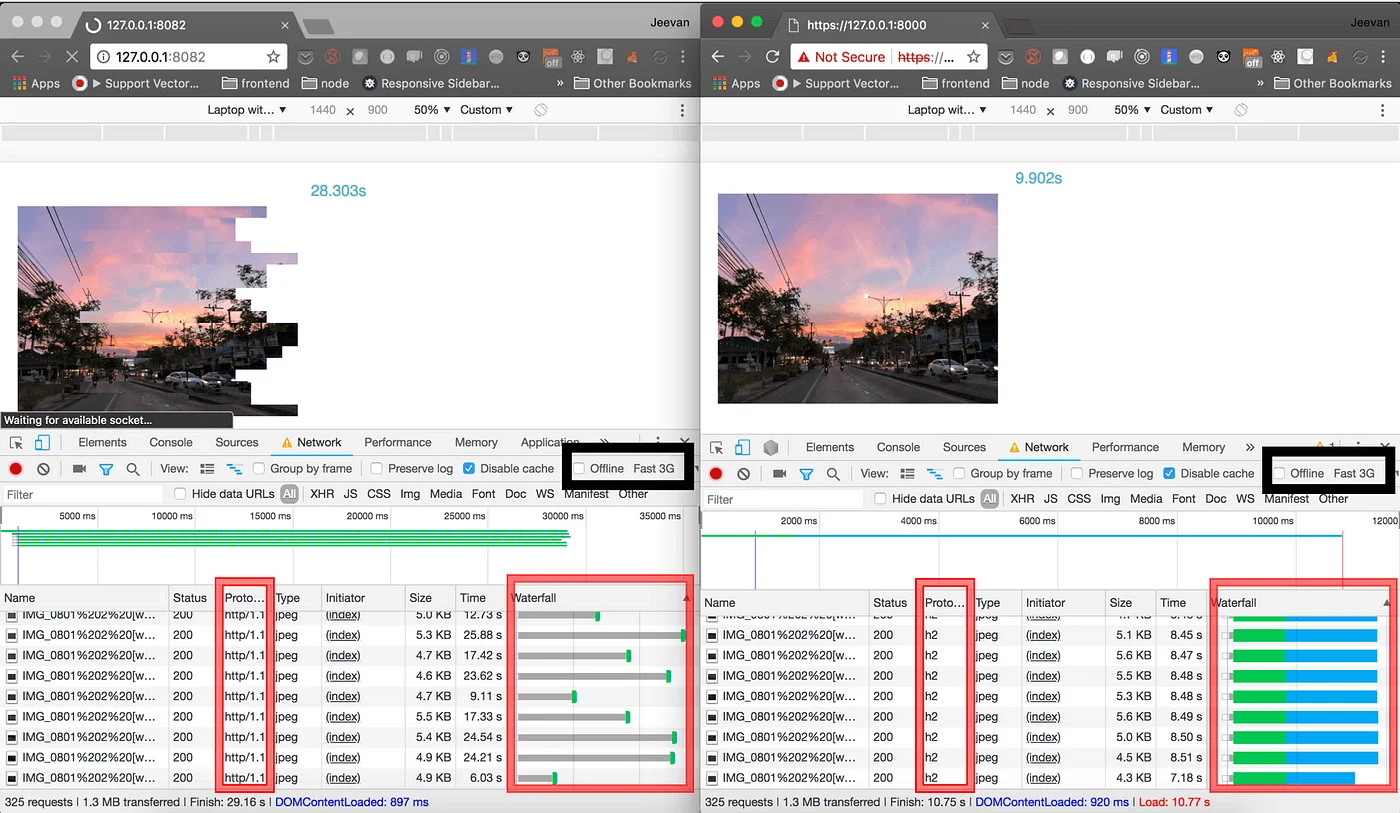
通过瀑布部分,可以明显地掌握单个 TCP 连接使用与多个 TCP 连接使用之间的差异。
如果您想获得 http2 可以提供的第一手经验,请按照此处的说明在您的计算机中运行上述演示。
因此,选择您的客户端或服务器库实现并开始使用 http2!
完整的代码可以在github上找到。
参考:
- https://http2.github.io/faq
- https://http2.akamai.com/demo
- https://github.com/http2/http2-spec/wiki/Implementations
- https://caniuse.com/#feat=http2
- https://nodejs.org/dist/latest-v10.x/docs/api/http2.html
如果你觉得这个故事有用的话,请点个赞支持一下👏