[译]OAuth2 with Spring 第3部分:使用Spring授权服务器授予authorization_code OIDC客户端
在上一篇文章中,我们讨论了使用 client_credential 的 OAuth2 授权服务器配置。在本文中,我们将讨论使用 authorization_code 授予类型的授权服务器配置。此授权流程将有一个 OIDC 客户端,它将通过使用授权码进行请求来获取 JWT 令牌。
如今,社交登录非常流行,它已由 OAuth2 和 OIDC 规范标准化。我们今天的讨论主题是设置我们的社交登录客户端 (oidc-client) 应用程序,将其注册到 Spring Boot 授权服务器,使用授权服务器登录并从 OIDC 客户端应用程序访问安全资源。
今天的演示将包含 2 个应用程序:
- 授权服务器(端口 8080)
- 社交登录客户端(端口 8081)
由于这是一个复杂的主题,让我们首先查看 UI 中的应用程序身份验证和授权流程,然后再讨论配置。
要继续阅读本文,请从此处获取项目源代码。首先启动授权服务器应用程序,然后在您最喜欢的 IDE 上启动社交登录客户端应用程序。
我们的社交登录客户端有 2 个端点:
- “/” 将使我们能够访问公共数据
- “/private-data” 将为我们提供 JWT 令牌
在浏览器上,导航到“ http://127.0.0.1:8081/private-data ”。这将带我们进入客户端应用程序的登录页面。
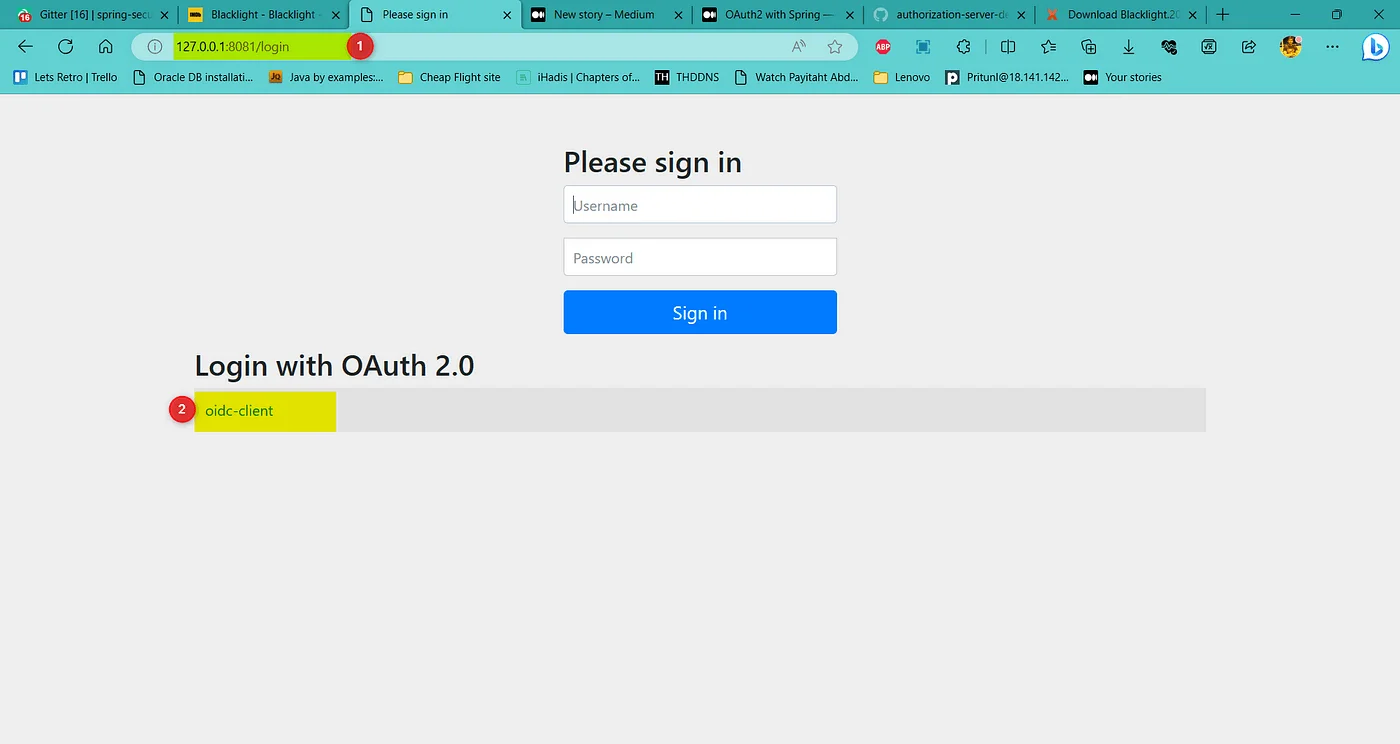
由于我们对社交登录感兴趣,因此不要在此登录页面中输入您的用户名和密码,而是单击oidc-client。它将带您进入授权服务器的登录页面。
在下面的屏幕中输入“ user”作为用户名,输入“ secret”作为密码,然后单击“登录”。
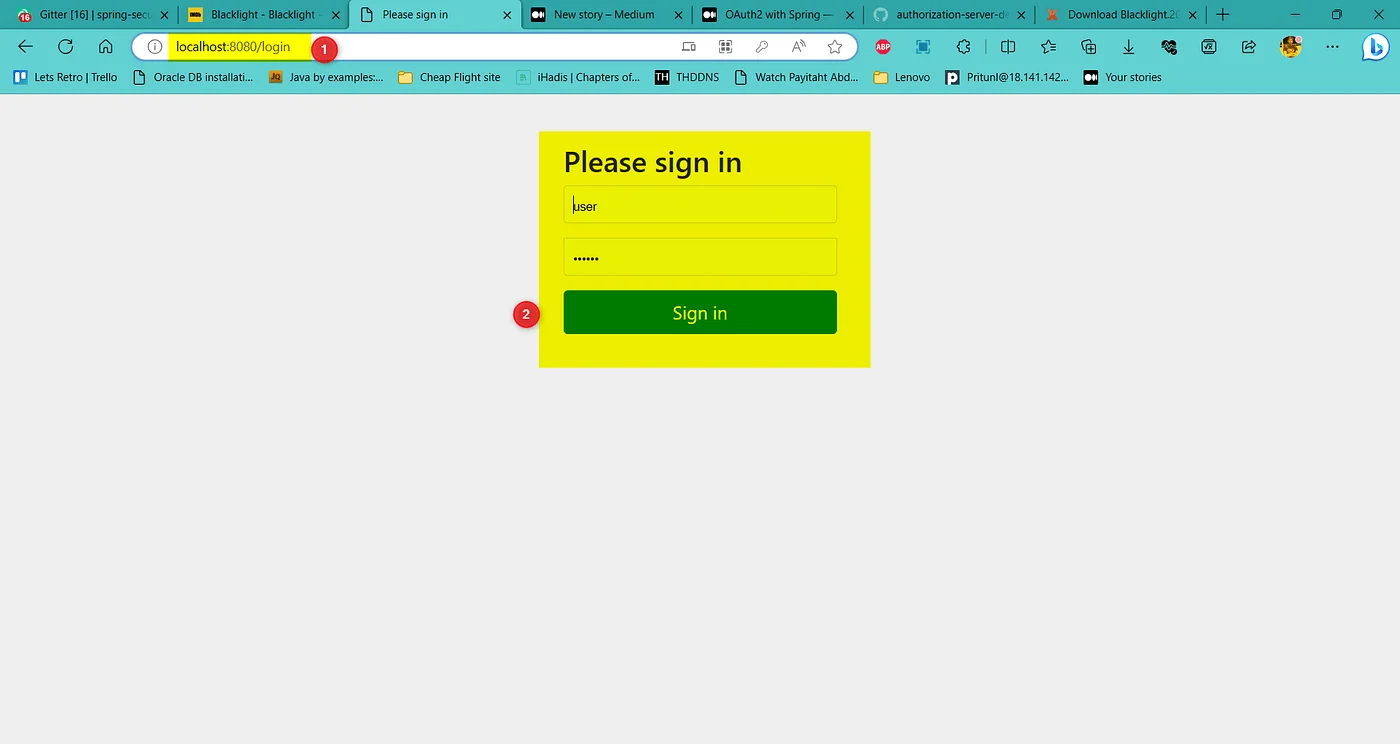
这将带您进入同意页面。请注意同意页面的以下 URL:
从上面的URL我们可以找到几条信息:
- response_type=code
- client_id=oidc-client
- scope = openid, profile, read, write
- redirect_uri=http://127.0.0.1:8081/login/oauth2/code/oidc-client
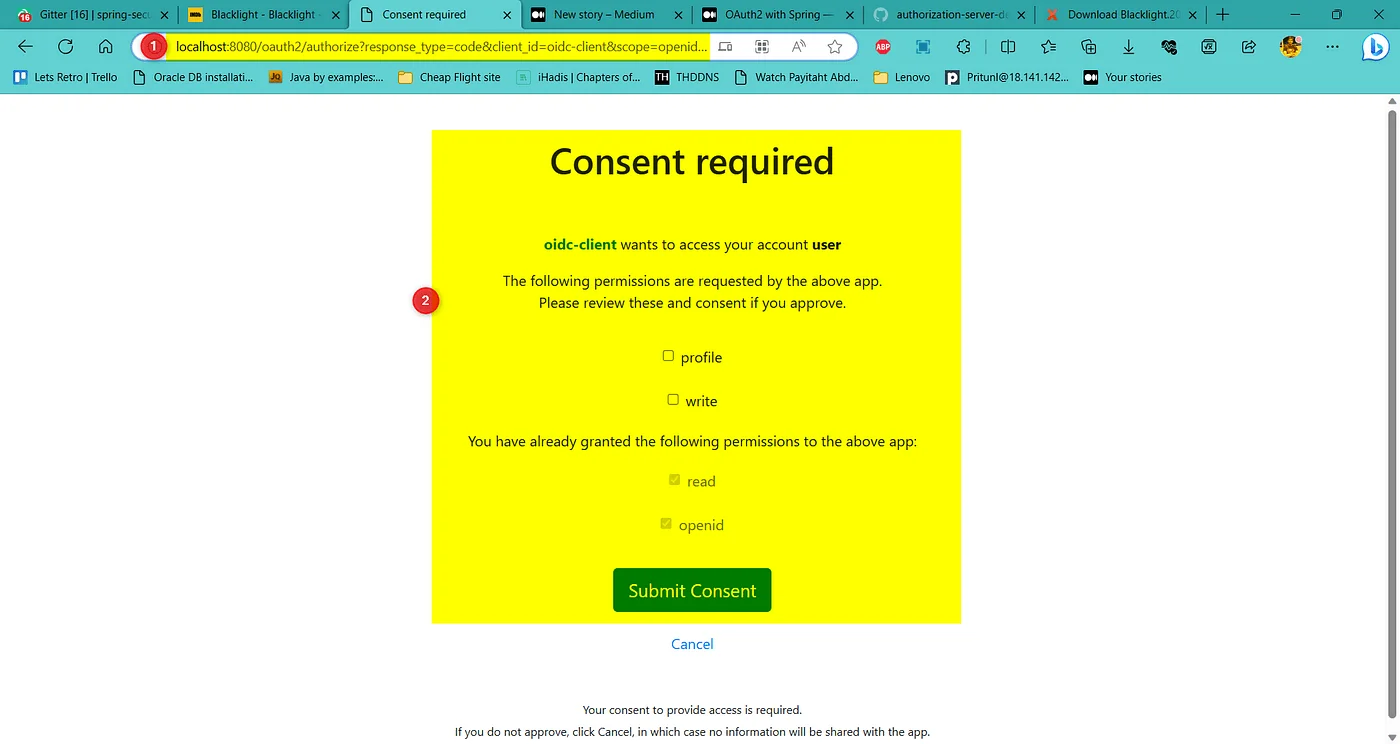
现在,从上面的页面提供您想要允许客户端应用程序的同意。
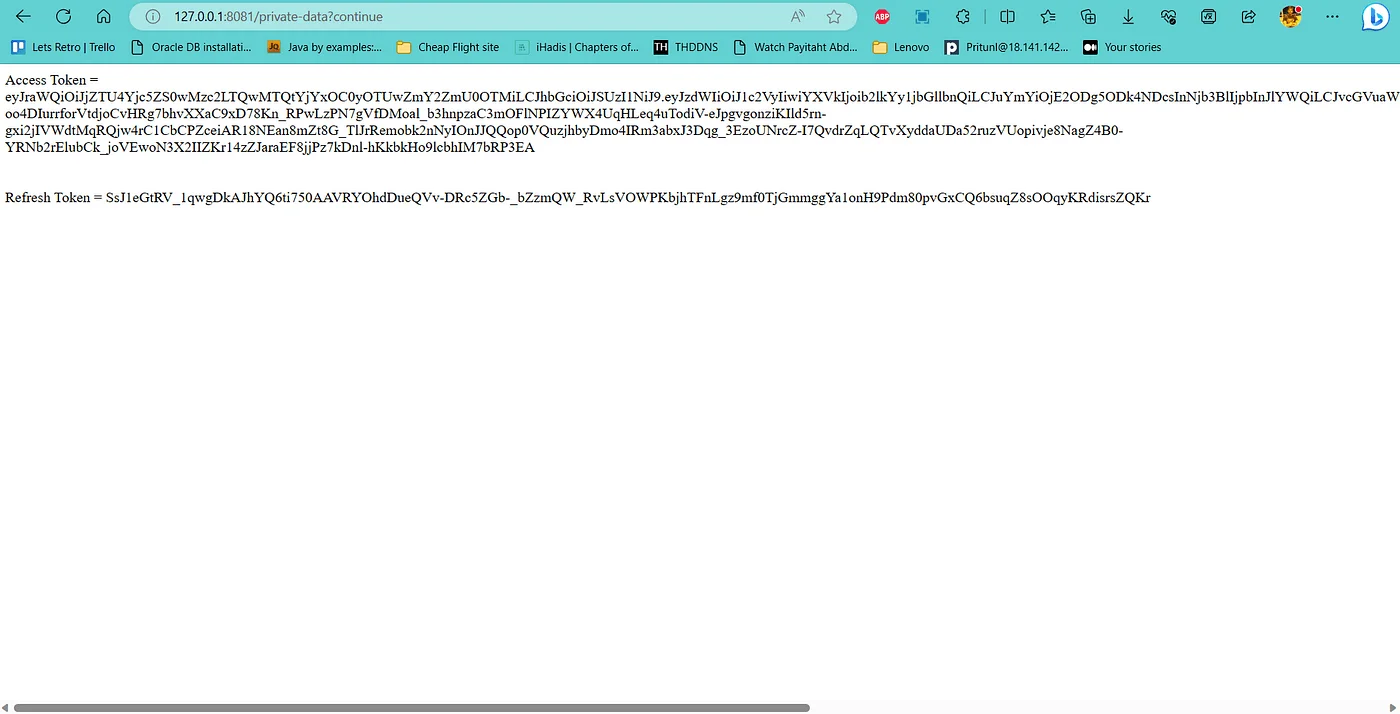
如果最初请求的URL(/private-data)具有您刚刚提供的正确同意,它将向我们提供访问令牌和刷新令牌,否则它将显示403错误页面。
现在让我们深入研究代码。
授权服务器配置
在这个应用程序中,所有的事情都在 application.yml 文件中完成。Java 方面没有什么内容,除了主类。
spring:
  security:
    user:

      # Definition of the user details that we will use for login
      # in the authorization server

      name: user
      password: "{noop}secret"
      roles: USER

    # Oauth2 client registration starts from here

    oauth2:
      authorization-server:
        client:

          # We have defined only one client: oidc-client
          # This client information was also mentioned
          # in the above URL: client_id=oidc-client

          oidc-client:
            registration:

              # The following client ID and client secret will be matched with the
              # provided client credentials from client application

              client-id: oidc-client
              client-secret: "{noop}secret2"

              # The following authorization-grant-type will be matched with the
              # provided authorization-grant-type from the client application

              authorization-grant-types:
                - "authorization_code"
                - "refresh_token"
              client-authentication-methods:
                - client_secret_basic

              # This following redirect URI will be used to redirect the resource owner to the
              # Client application after the resource owner (user) provides necessary consents.

              redirect-uris:
                - http://127.0.0.1:8081/login/oauth2/code/oidc-client
              post-logout-redirect-uris:
                - http://127.0.0.1:8081/logout

              # The scopes are defined in the authorization server.
              # These won't display in the consent page

              scopes:
                - "openid"
                - "profile"
                - "read"
                - "write"

            # Marking this flag as true will display the consent page

            require-authorization-consent: true

            # Here we set the access token and refresh token validity duration
            # in seconds

            token:
              access-token-time-to-live: 3600s
              refresh-token-time-to-live: 7200s
#        endpoint:
#          token-uri: "/oauth2/token"
#        issuer-uri: http://127.0.0.1:8080/issuer
logging:
  level:
    org:
      springframework:
        security: trace
社交登录客户端
客户端应用程序有一些 java 代码以及 application.yml 配置。
application.yml
server:
  port: 8081

logging:
  level:
    org:
      springframework:
        security: TRACE

spring:
  security:
    oauth2:
      client:
        registration:

          # Client registration starts here
          oidc-client:

            # Our oidc-client needs a provider. The provider information has been registered
            # at the bottom of this configuration
            provider: spring

            # The following client-id and client-secred will be sent to the authorization server
            # for client_credentials authentication to the authorization server. We don't need to
            # mention the client_credentials in the grant type here. Note that, here the client-secret
            # must not have {noop} or any other encoding type mentioned.

            client-id: oidc-client
            client-secret: secret2

            # Our authorization grant type is authorization_code
            authorization-grant-type: authorization_code

            # The following redirect URL is the redirect URL definition of our client Server application.
            # It is generally the current application host address. The authorization server's redirect URL
            # definition means that this URL will be triggered when auth server redirects data to here.
            redirect-uri: "{baseUrl}/login/oauth2/code/{registrationId}"

            # Scopes that will be displayed for requesting in the consent page.
            # Authorization server must have equal or more scopes than these in number
            scope:
              - openid
              - profile
              - read
              - write
            client-authentication-method: client_secret_basic

            # This client name will display in the login screen as social login type
            client-name: oidc-client

        # As mentioned above about provider, here we register the provider details
        # for any unknown provider with their issuer URI
        provider:
          spring:
            issuer-uri: http://localhost:8080

      # Since our application acts as both authorization client and resource server,
      # here is the configuration for resource server
      resource-server:
        jwt:
          issuer-uri: http://localhost:8080
Controller:
package com.mainul35.socialloginclient;

import org.springframework.beans.factory.annotation.Autowired;
import org.springframework.http.ResponseEntity;
import org.springframework.web.bind.annotation.GetMapping;
import org.springframework.web.bind.annotation.RequestMapping;
import org.springframework.web.bind.annotation.RestController;

@RestController
@RequestMapping("/")
public class AppController {

    @Autowired
    private AppService appService;

    @GetMapping("/")
    public ResponseEntity<String> getPublicData() {
        return ResponseEntity.ok("Public data");
    }

    @GetMapping("/private-data")
    public ResponseEntity<String> getPrivateData() {
        return ResponseEntity.ok(appService.getJwtToken());
    }
}
Service:
由于我们的服务方法中有*@PreAuthorize(“hasAuthority(‘SCOPE_read’)”)*,所以我们必须允许来自同意页面的“读取”权限来访问这些数据,否则我们将收到 403 错误页面。您可能对我们如何在此处获取刷新令牌感兴趣。
package com.mainul35.socialloginclient;

import org.springframework.beans.factory.annotation.Autowired;
import org.springframework.security.access.prepost.PreAuthorize;
import org.springframework.security.core.Authentication;
import org.springframework.security.core.context.SecurityContextHolder;
import org.springframework.security.oauth2.client.OAuth2AuthorizedClient;
import org.springframework.security.oauth2.client.OAuth2AuthorizedClientService;
import org.springframework.security.oauth2.client.authentication.OAuth2AuthenticationToken;
import org.springframework.security.oauth2.core.OAuth2AccessToken;
import org.springframework.security.oauth2.core.OAuth2RefreshToken;
import org.springframework.stereotype.Service;

@Service
public class AppService {

    @Autowired
    private OAuth2AuthorizedClientService authorizedClientService;
    @PreAuthorize("hasAuthority('SCOPE_profile')")
    public String getJwtToken() {
        var authentication = SecurityContextHolder.getContext().getAuthentication();
        var accessToken = getAccessToken(authentication);
        var refreshToken = getRefreshToken(authentication);
        return String.format("Access Token = %s <br><br><br> Refresh Token = %s",
                accessToken.getTokenValue(), refreshToken.getTokenValue());
    }

    public OAuth2AccessToken getAccessToken (Authentication authentication) {
        var authorizedClient = this.getAuthorizedClient(authentication);
        if (authorizedClient != null) {
            OAuth2AccessToken accessToken = authorizedClient.getAccessToken();
            if (accessToken != null) {
                return accessToken;
            }
        }
        return null;
    }
    public OAuth2RefreshToken getRefreshToken(Authentication authentication) {
        var authorizedClient = this.getAuthorizedClient(authentication);
        if (authorizedClient != null) {
            OAuth2RefreshToken refreshToken = authorizedClient.getRefreshToken();
            if (refreshToken != null) {
                return refreshToken;
            }
        }
        return null;
    }

    private OAuth2AuthorizedClient getAuthorizedClient(Authentication authentication) {
        if (authentication instanceof OAuth2AuthenticationToken) {
            OAuth2AuthenticationToken oauthToken = (OAuth2AuthenticationToken) authentication;
            String clientRegistrationId = oauthToken.getAuthorizedClientRegistrationId();
            String principalName = oauthToken.getName();
            return authorizedClientService
                    .loadAuthorizedClient(clientRegistrationId, principalName);
        }
        return null;
    }
}
SocialLoginClientApplication:
我们必须用@EnableMethodSecurity注释我们的Main类以允许应用程序中的方法安全。
package com.mainul35.socialloginclient;

import org.springframework.boot.SpringApplication;
import org.springframework.boot.autoconfigure.SpringBootApplication;
import org.springframework.security.config.annotation.method.configuration.EnableMethodSecurity;

@EnableMethodSecurity
@SpringBootApplication
public class SocialLoginClientApplication {

 public static void main(String[] args) {
  SpringApplication.run(SocialLoginClientApplication.class, args);
 }

}
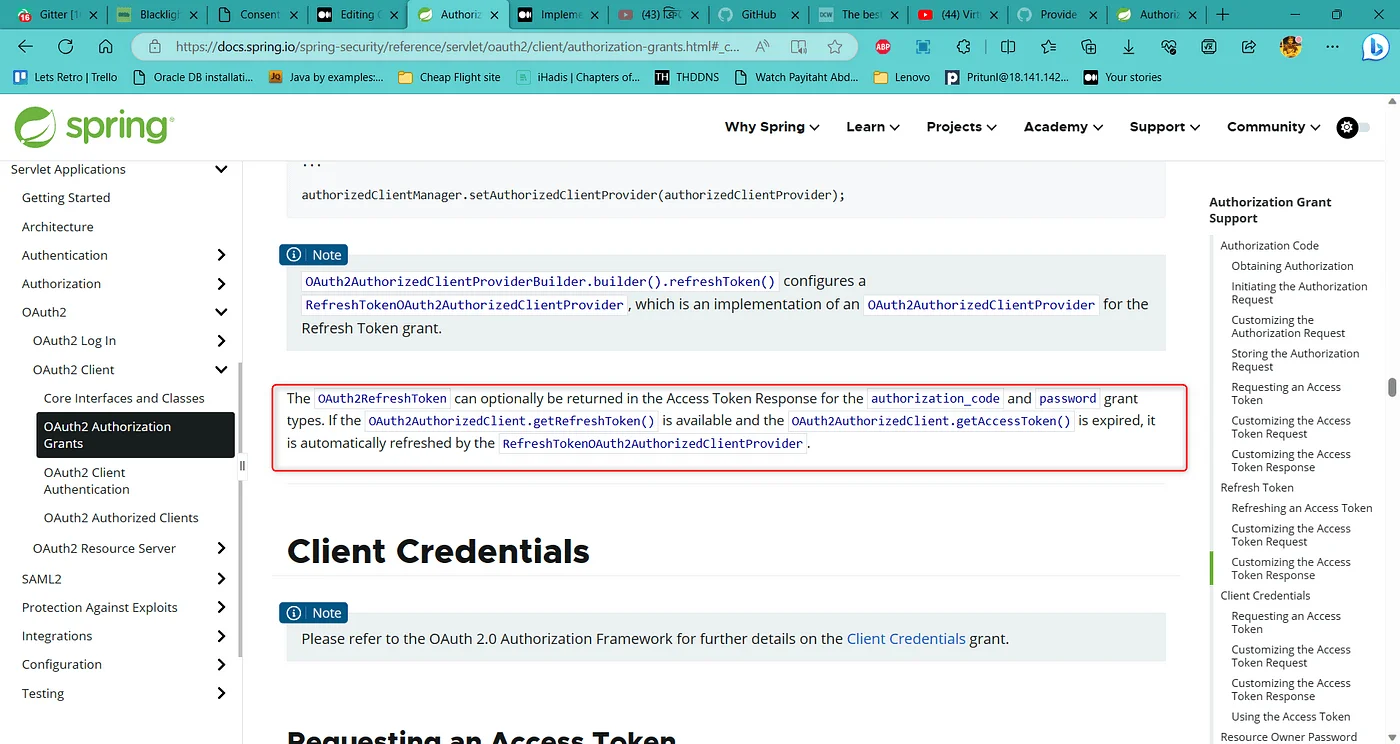
根据Spring Security 文档,对于“ authorization_code”授予,如果OAuth2AuthorizedClient.getRefreshToken()可用并且OAuth2AuthorizedClient.getAccessToken()已过期,则会自动刷新RefreshTokenOAuth2AuthorizedClientProvider。
感谢您的耐心阅读。在下一篇文章中,我们将尝试了解如何在客户端应用程序中使用 Google 作为授权服务器。
此示例的完整代码可在此处找到。
